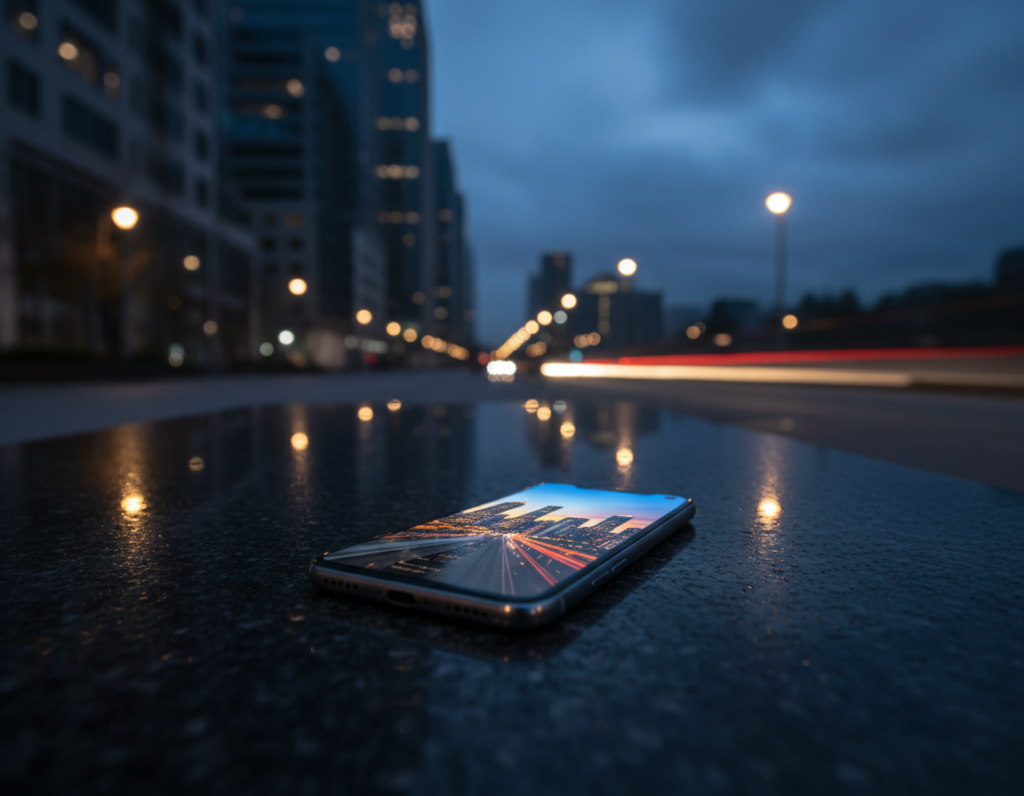
This short field guide explains why evening images from many phones can look less sharp than what your eyes see. In low light, cameras must choose between longer exposures or higher gain. Both choices change what you get — blur from motion or more visible noise.
Smaller sensors capture less light and often rely on heavy processing to compensate. That amplification and software work can smooth detail and hide texture. Other causes include camera shake, subject motion, and aggressive noise reduction.
This guide helps you diagnose the real cause and shows practical fixes you can use on the street, at concerts, or while traveling. Follow quick visual checks, then adjust lens, stabilization, exposure, shooting mode, lighting, and editing to get sharper edges, truer texture, and cleaner shadows without making scenes look fake.
What “Soft” Really Means in Night Photography
Knowing whether blur, noise, or aggressive smoothing is at work makes your fixes much more effective. The word covers several distinct failures. Grouping them helps you test and correct the issue quickly.
Blur, noise, and smudged detail
Motion blur shows as streaked edges and loss of fine lines. It happens when the shutter is long or the subject moves.
High-ISO noise looks like grain and color speckles. This can hide micro-detail so an image reads as less sharp even if focus is right.
Smudged detail is a processing artifact. The phone averages patterns to hide noise, creating a watercolor or waxy texture.
Why texture disappears in dark, low-contrast areas
Shadows lose tonal separation first. When contrast is weak, edges have less signal for the processor to preserve.
That makes the phone favor cleaner-looking shadows over tiny texture. Better directional light or added contrast often restores perceived sharpness more than boosting exposure alone.
Quick 100% check
- Zoom to 100% and inspect edges (signs, window frames, hair).
- Compare flat areas (sky, walls) to see if detail was smoothed.
- Decide if the issue is blur, noise, or smoothing before changing settings.
Why Smaller Sensors Struggle After Dark
When light levels fall, the amount of information each pixel can record drops fast, and that changes the whole image.
Less light per pixel and the need to amplify the signal
Photons are the currency of imaging. Smaller pixels simply collect fewer photons, so the camera must either keep the shutter open longer or boost gain.
Longer exposures create blur from hand or subject motion. Higher gain (ISO) amplifies the signal and the noise, which washes out color and fine texture.
Dynamic range limits: clipped highlights and muddy shadows
Bright lamps and headlights clip quickly while nearby shadows lose detail. This reduced dynamic range flattens the scene and cuts perceived sharpness.
“Protecting highlights and exposing for midtones often preserves more real detail than simply brightening shadows.”
How tiny lenses and sensor size affect detail capture
Small optics have narrow apertures and face diffraction limits, which reduce micro-contrast compared to larger systems.
- Less photon capture forces heavy processing from computational technology.
- Multi-frame stacking helps, but misalignment can leave images clean yet soft.
- Choosing the main lens, stabilizing the phone, and guarding highlights lets the sensor keep more true detail.
For a quick deep dive on physics and practical fixes, see why phone cameras struggle in low.
How Computational Photography Can Create Softer-Looking Images
Computational photography often rescues dark scenes by combining many frames into a single, cleaner file. Night mode typically captures a burst over several seconds, aligns the frames, and blends them to lower noise and raise exposure.
Multi-frame stacking and alignment errors: If your hands move or the subject shifts, alignment algorithms can’t perfectly register each frame. The result is doubled edges or a general lack of micro-contrast that looks like missed focus.
Noise reduction that wipes fine detail: Aggressive reduction smooths tiny patterns—skin pores, brick texture, or foliage—to hide grain. That smoothing removes the very cues our eyes use to judge sharpness.
Sharpening halos and over-processed edges: Some models apply strong sharpening after reduction. This can create halos and crunchy outlines that feel artificial and still fail to restore true detail.
Practical takeaway: The best defense is cleaner input: steady hold, use the main lens, and avoid extreme exposure boosts. When scenes move or light mixes, consider manual mode or shorter exposures instead of relying only on computational stacking.
Common Real-World Causes of Soft Night Photos on Phones
Real shooting reveals the usual suspects: camera shake, moving subjects, missed focus, and flare from bright light sources. Each one leaves a different trace and needs a different fix.
Subject movement vs camera shake
Longer exposures increase motion blur. Hand tremor leaves a gentle blur across the frame. A moving subject makes streaks or doubled outlines.
Shutter speed and stability change everything in low light. Night Mode’s longer capture window makes small movement visible, especially in faces and text.
Autofocus hunting and missed focus
In low light the lens can hunt or lock onto the wrong plane. That shifts the focus during capture and renders the main subject soft.
Practical fix preview: tap-to-focus on your subject, then use focus/exposure lock when the option appears.
Dirty glass and flare from bright lights
Fingerprints and dust create haze and veiling flare. Bright lamps can wash micro-contrast across the frame and make the whole image look weaker.
- Break down movement: hands vs people, cars, or tree branches; each makes a distinct blur.
- Night Mode expands capture time, so steady support is more important when shooting.
- Keep the lens clean; wipe before a shoot to avoid flare from strong light sources.
soft night photos smartphone small sensor problem: Fast Diagnosis Checklist
Before you change any settings, run a quick test to pick the right fix.
Use this short routine to identify whether the issue is motion, processing, focus, or lens choice. Each step takes under two minutes.
Check shutter speed and stabilization prompts
Open the capture info or EXIF if available. Note the shutter time and any stabilization warnings that say to “hold steady.”
If the shutter shows multiple seconds, expect motion in stacked frames. That points to stability fixes first.
Inspect edges and textures at full resolution
Zoom to 100% and look at edges. Doubled or ghosted outlines mean alignment or motion issues.
Uniform, creamy smoothing across repeated patterns (brick, hair, gravel) suggests aggressive noise reduction rather than blur.
Compare lenses and framing
Shoot the same scene with the 1x main lens, the ultra-wide, and any digital zoom. The main camera will usually hold more detail in low light.
Note which of your phones or lenses looks noisiest or softest; that helps route you to stabilization, exposure, or mode changes.
- Quick checklist: capture info, edge test, texture test, lens comparison.
- Use results to choose a fix: steadier support, faster shutter, different mode, or gentler editing.
- For best results in smartphone photography, prefer the main lens and watch the exposure settings.
Use the Right Lens and Framing for Low Light
Picking the right lens and frame often fixes low-light clarity before you touch exposure or editing. Start by choosing the main camera and composing to give the sensor the best signal possible.
Why the main 1x camera usually wins
The 1x or primary lens typically has the biggest optics and the best processing pipeline. That means it gathers more light per pixel and benefits from priority tuning in the phone’s software. Use it first when detail matters.
When ultra-wide and telephoto get noisier
Ultra-wide lenses spread the same light across a wider field and often use a smaller effective sensor area. That forces heavier noise reduction and visible loss of texture in shadow areas.
Telephoto modes can be true longer‑glass or a cropped digital zoom. Both reduce signal and amplify noise after dark. If your goal is clarity, avoid native zoom at night.
Framing tips to preserve detail
- Move closer instead of zooming; crop later if needed.
- Place the subject against higher contrast or a nearby light to protect edges.
- Start at 1x, stabilize the phone, then reframe—this keeps more usable detail in your images.
“Smaller sensors plus aggressive processing are the core drivers of the softer look in low-light captures.”
Stabilization Techniques That Immediately Improve Sharpness
Simple supports and small changes to how you trigger the shutter often yield the biggest clarity gains for night shooting. Make stability your first fix so the camera can use lower ISO and cleaner stacking.
Tripod and phone mount basics
A compact tripod plus a clamp is the fastest win. A three‑leg base with a wide stance and low center of gravity reduces wobble.
Use the main lens, set steady settings, and let the mount hold the phone for longer exposures. Proper placement keeps the stack aligned and the final shot sharper.
DIY supports: ledges, backpacks, rails, and rocks
When you don’t carry a tripod, improvise. Rest the phone on a backpack, brace it on a railing, or wedge it between stones.
These tricks stabilize the camera enough to drop ISO and avoid blur in longer captures. They work well in street work and casual smartphone photography.
Prevent tap shake with timer, remote, or volume shutter
Use a 2–3 second timer, a Bluetooth remote, or the volume button to trigger the shutter. Even a tiny finger jerk can ruin multi‑second stacks.
Set the timer, press the trigger, and wait a beat before the exposure ends to avoid vibration.
How to hold steady for multi-second stacks
Braced elbows, phone pressed to chest or face, and a slow exhale before the capture help when you must handhold. Hold still for an extra beat after the exposure begins.
Stabilization also improves alignment for multi-frame processing, reducing ghosting and the softer look that comes from drift.
- Make stabilization the fastest win: stop motion, then lower ISO for cleaner detail.
- Tripod + clamp = reliable, repeatable shot.
- Use ledges, rails, or a pack when a tripod isn’t available.
- Timer or remote prevents tap shake and protects long exposures.
“Remove motion first; everything else becomes easier and more effective.”
Exposure Settings That Balance Noise, Blur, and Detail
Balancing exposure is about choosing which element to protect: detail, tones, or movement. Your camera has two levers: how long the shutter stays open and how much the sensor gain is raised.

Shutter vs ISO: choose what to sacrifice
Shutter speed gathers light over time; ISO amplifies the captured signal. Longer shutter times give cleaner detail at lower ISO, but they risk blur if hands or the subject move.
Faster shutter speeds freeze action but usually require higher ISO and therefore more visible noise. For many phones, start around ISO 400–800 for handheld city scenes and adjust from there.
Protect highlights by underexposing slightly
Bright lamps and neon clip quickly. A small negative exposure compensation keeps lamps from blowing out and preserves tonal separation in the midtones and shadows.
It’s easier to lift shadow detail later than to recover blown highlights. Preserving highlights helps the whole scene read as sharper.
Handle neon and high‑contrast lamps
Neon fools metering and pushes the camera to overexpose surrounding tones. Use manual exposure or exposure compensation to hold the brightest points.
Strategies for moving subjects
- Freeze: pick a faster shutter, accept more noise, and use higher ISO.
- Embrace blur: use long exposures for light trails or creative streaks when the subject is moving.
- Reshoot: add support or more light if you need both detail and clarity.
“Choose the exposure that protects the element most important to the shot: texture, tones, or motion.”
When to Use Night Mode vs Pro or Manual Mode
Pick the capture mode that matches the scene: the right option can save time and keep detail. Use the automatic stack when you need quick, cleaner files from a handheld shot. Switch to manual control when motion or tricky lighting makes stacking unreliable.
Night Mode strengths: quick results with frame stacking
Night mode blends several frames to lower noise and brighten shadows. It works best for handheld, mostly static scenes where stability is reasonable and the subject isn’t moving.
Stacking often gives a natural exposure and less visible grain without fiddling with settings.
Manual control for ISO, shutter speed, and consistency
Pro or Manual mode gives you predictable outcomes by fixing ISO, shutter speed, and white balance. Use it when action, changing lights, or mixed sources confuse multi-frame algorithms.
Set a specific shutter speed and ISO so each attempt behaves the same. That removes surprises and helps you learn what settings match the scene.
Lock focus and exposure to stop hunting and shifts
Locking focus and exposure prevents the camera from “breathing” focus or re-metering during a long capture. This is a simple way to avoid mid‑shot shifts that blur edges or create odd composites.
Quick workflow: try night mode first, inspect the image at 100%, then switch to manual and repeat with locked focus if you see smeared edges or alignment artifacts.
“Choose the mode that protects the element most important to the shot: motion, tone, or fine detail.”
- When to use night mode: handheld, static scenes, low light, quick results.
- When to go manual: moving subjects, mixed light, or when you need repeatable control.
- Always lock focus/exposure and stabilize the phone or camera for the best stack alignment.
Get Better Light, Not Just Brighter Photos
At night, shaping existing light often improves clarity more than simply boosting exposure. Aim to make the scene readable by adding direction and contrast instead of only lifting shadow tones.
Work with ambient sources to add shape. Position your subject so a street lamp or neon sign hits from the side to reveal texture. Backlight for separation and use practical lamps as compositional anchors to define edges.
Avoid harsh flash unless you want a flat look
Flash can save a moment, but it often flattens the scene and kills atmosphere. Use it only when you accept direct, clinical light or when no other option exists.
Use reflections to amplify available light
Wet pavement, puddles, and calm water boost brightness and color without raising ISO. Reflections add contrast and mood while preserving more fine detail in shadows.
Simple light painting for foreground detail
For long exposures, gently sweep a small flashlight across foreground elements. Keep strokes brief and subtle so the fill feels natural and not staged.
- Shift the mindset: make the subject readable with direction and contrast, not just brighter.
- Side light adds texture; backlight gives separation; practical lamps anchor composition.
- Reflections multiply available illumination; use them to lower gain and retain texture.
- Light painting is a low-cost technique to reveal foregrounds during shooting.
“When the scene has clearer contrast and usable light, the camera needs less aggressive processing and preserves more texture.”
Tieback: Better placement of light sources improves photography with compact systems and reduces the need for heavy noise reduction or aggressive sharpening.
Edit for Crisp, Natural Results Without Over-Smoothing
A smart workflow preserves shadow detail while cleaning noise and maintaining the scene’s atmosphere. Start with the cleanest capture so you have the most information to work with in post.
Shoot RAW when you can. RAW files retain far more shadow and color data than baked JPEG/HEIC outputs. That extra information gives safer lifts, fewer artifacts, and better color fixes.
Selective noise reduction and edge protection
Reduce noise mainly in darker areas and use masks to protect edges and fine texture. Global smoothing quickly kills micro-detail and makes skin, brick, or foliage look flat.
Fix mixed white balance without killing mood
Local white-balance tweaks keep skin and neutral surfaces believable while keeping neon, tungsten, and LED tones that define the scene. Preserve contrast and avoid a uniform color wash.
Restore micro-contrast and sharpen sparingly
Apply modest clarity or texture to recover perceived sharpness, then sharpen with a small radius. Sharpen after noise reduction and watch for halos around bright outlines.
“Careful RAW editing and selective reduction let a well-shot file print with real detail—one camping shot printed at Artbeat Studios scored 29/30.”
- Keep original files and export high-quality copies for sharing or print.
- Avoid heavy compression for prints; export a clean, high-resolution file.
- Use this article’s workflow: capture RAW, selective noise reduction, local white-balance, gentle micro-contrast, restrained sharpening.
Conclusion
Summary: Limited light capture, higher noise, alignment artifacts from stacking, motion blur, and over‑aggressive smoothing explain why many night photos look weaker on compact devices.
Quick wins: use the main 1x camera, stabilize aggressively, protect highlights, and avoid digital zoom in low light. These steps recover real detail more than heavy post processing.
Adopt a repeatable workflow: inspect at 100%, then change lens, mode, or exposure and retest. Edit with selective noise reduction and restrained sharpening for natural results.
Try the checklist on your next walk: shoot a side‑by‑side (Night Mode vs Manual), save a night editing preset, and note which settings help in common situations. Modern phone models can deliver crisp night photos when technique matches the limits of a small sensor.