Traffic light streaks are the long, flowing lines made by moving car signals in low-light photography. They depend on exposure time and a steady capture, not just megapixels. Rolling shutter effects and flickering LEDs can add odd, jagged patterns that spoil an otherwise great image.
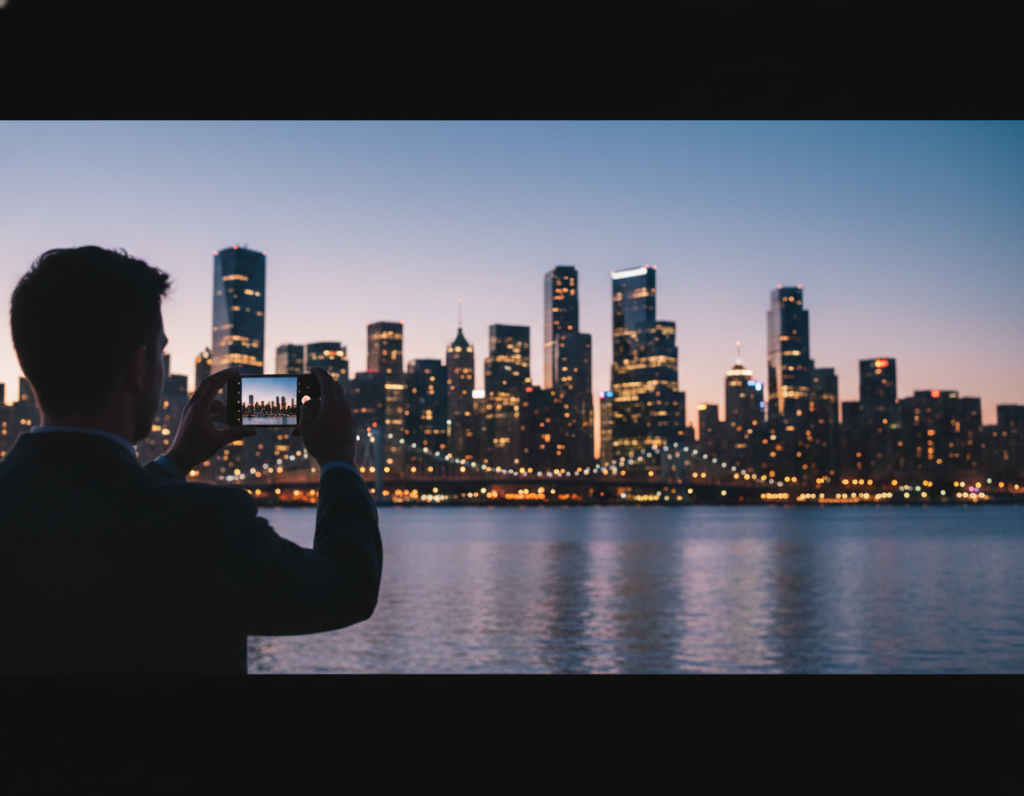
This short guide will show how to set up your phone app, pick useful modes, and troubleshoot ugly banding or blue and purple defects. You will learn how to move from planning and capture to stabilization, then to simple editing steps to fix artifacts.
Expect clearer lines, controlled highlights, and a cleaner night background with less blur and noise. Different phones and capture modes behave differently in low light, so testing repeatable options matters for consistent results.
Takeaway 1: Stabilize and choose the right capture mode to reduce artifacts before editing.
Takeaway 2: Distinguish intentional streaks from unintentional banding and correct each stage of the workflow.
What makes traffic light streaks look smooth in night photography
When you record moving traffic for longer periods, points of bright sources map into continuous, graceful lines. This is the core idea behind long exposure work: the sensor sums light over time so heads and taillights become trails.
Shutter speed and exposure length directly control how long each trail appears. A slower shutter records more path and denser lines, while a shorter exposure gives short, dotted traces. Think of the shutter as the time window that turns motion into a visible mark.
Stability is crucial. In low light, even a steady hand can introduce blur during a long exposure. Any wobble makes trails jittery and reduces perceived smoothness. Use a firm mount or rail to keep the frame fixed.
Ambient scene glow affects the background and contrast. City glow can reveal context and color, while very dark scenes push backgrounds toward black and make bright streaks look harsh. Too much contrast clips highlights into thick blobs; balanced contrast keeps trail edges crisp and readable.
Time and traffic speed interact: faster vehicles plus longer exposure yield long, uninterrupted trails. Slow moving cars produce segmented or dotted lines. As a rule of thumb, smooth trails show even brightness, minimal jitter, and a background that supports the subject rather than overpowering it.
- Long exposure turns points into lines.
- Keep the camera stable to avoid blur.
- Manage contrast so highlights stay clean.
Set up your smartphone camera app for manual control
Compose first, then lock down the frame. Start by setting the app to a manual or advanced mode when available. This gives control over exposure length and movement rendering, which is key for smooth lines from moving traffic.
Finding Manual vs Night modes on common phones
Open the phone camera and look for an advanced or Pro/Manual option in the mode list. Night mode automates stacking and stabilization, which helps in very low light.
Use manual control when you need consistent trails. Night mode is helpful for quick low-light shots, but automated stacking can alter how continuous lines appear.
Choose the best lens and avoid digital zoom
Pick the main lens for low-noise results. Avoid digital zoom; it increases grain and weakens line clarity.
Wide lenses accentuate leading lines, while longer focal lengths compress traffic paths—choose by composition needs.
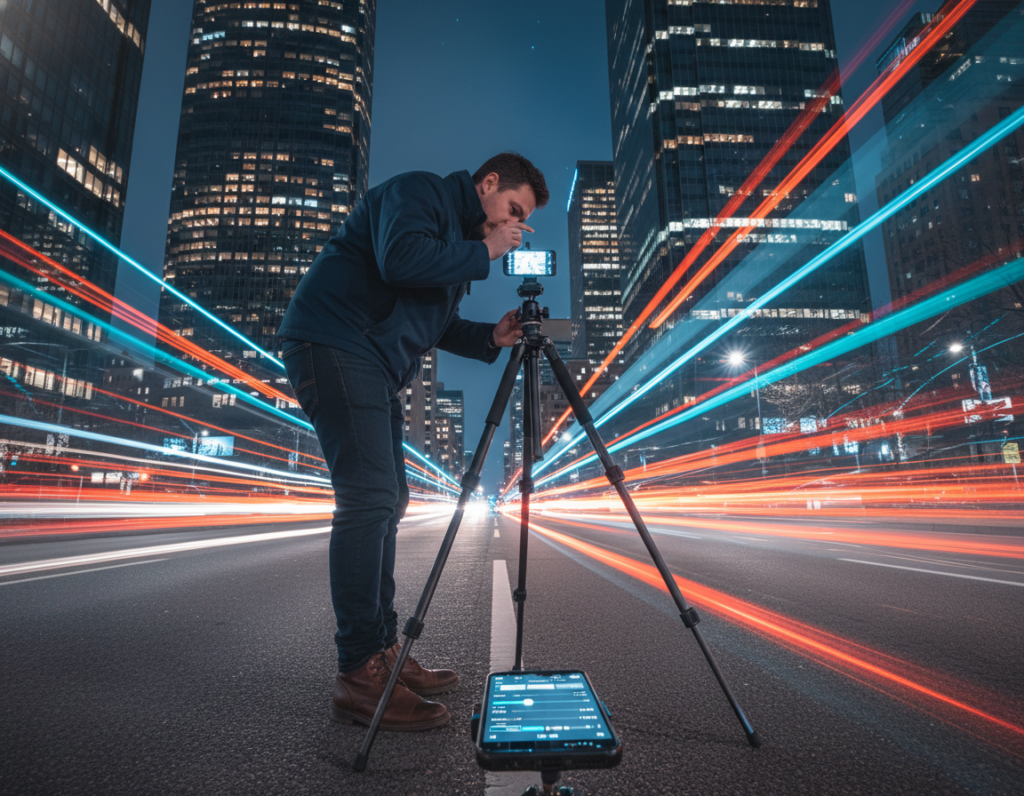
Use a timer or remote to reduce camera shake
Clean the lens, disable flash, enable grid/level, mount on a tripod or solid rail, and set a 2–5 second timer or use a remote to take photo hands-free. Even small tap-induced shake will soften edges, so hands-free triggering is essential.
- Checklist: clean lens, flash off, enable level, mount on tripod, timer/remote.
- Baseline workflow: compose → lock the phone down → confirm mode → then tweak exposure.
Pro camera settings for light streaks: shutter speed, ISO, and exposure time
Fine-tuning exposure and sensitivity is the fastest way to turn moving traffic into clean, continuous trails. Start with shutter length and ISO so highlights stay defined while the background remains controllable.
Recommended shutter speeds for city streets vs highways
For busy downtown avenues, try 2–8 seconds to capture clear, connected streaks without overwhelming glare. For highways and fast-moving lanes, extend to 10–20 seconds for long continuous trails.
Faster shutter speeds can reduce flicker-related distortion under some LED sources. If you see jagged lines, shorten the exposure and retest.
ISO strategy for cleaner images
Keep ISO low and increase exposure time first. High ISO adds noise and softens trail edges, especially in low light. Raise ISO only if the exposure time is already impractically long.
Exposure compensation, metering, and Night mode vs manual
Use spot or center-weighted metering to protect headlights from blowing out. Dial negative exposure compensation if highlights clip.
Night mode can stack and stabilize, producing cleaner backgrounds. Manual exposure gives predictable trail length and exposure control — test both to see which your phone prefers.
Focus and white balance tips
Lock focus to a mid-distance or infinity to avoid finder hunting. Set a fixed Kelvin or lock white balance so street colors remain consistent across frames.
“If artifacts appear only at extreme exposure times, try a shorter manual capture or let night mode pick a shorter stack.”
- Mini test plan: one moderate shot, then change one variable at a time.
- Watch for blue/purple artifacts at very long exposures and adjust accordingly.
Choose locations and conditions that produce better streaks
Location choice often matters more than tech: find places where vehicle flow and composition match. Good spots let headlights and taillights form clean lines while the background supports the scene.

Where to shoot and why those areas work
Try overpasses for top-down flow, intersections for crossing lines, curves for dynamic leading lines, and bridges for symmetry. Each spot shapes trails differently and offers varied contrast with the city.
Timing your shot for best conditions
Just after dusk is ideal because the sky keeps color and the background holds detail without forcing very long exposure times. Watch signal cycles and start captures when a stream of cars enters the frame.
Managing distractions
People, bright signs, and reflective surfaces can cause ghosting or strong patches during long captures. Reframe so harsh signs sit at the edge or are blocked by architecture.
- Test multiple angles in the same spot; small changes can cut direct exposure from LEDs and reduce jagged artifacts.
- Remember: continuous flow yields smooth lines, stop-and-go traffic gives segmented trails.
“Change your angle before changing your exposure; a slight shift often fixes flare and reflections.”
Stabilize the shot to avoid blur and missed focus
A steady support is the simplest way to stop tiny motion from ruining a long exposure. Even a small wobble can cause camera shake and blur, so pick the best mount before you take the shot.
Tripod vs railing vs solid surface placement
Tripod gives the most repeatable results and reduces camera shake across multiple frames. Use a low center column and a heavy build for windy spots.
A railing with a clamp is fast and useful on bridges. A solid surface plus a small wedge works well when you need a quick angle fix. Mount your phone or camera securely so nothing shifts during the exposure.
- Tripod: maximum stability and consistent framing.
- Clamp on railing: convenience with moderate repeatability.
- Solid surface + wedge: quick, stable, and simple.
Preventing micro-movement: tapping technique, level framing, and wind
Long exposure magnifies tiny motion. Micro-movement turns clean lines into fuzzy trails and softens the whole frame.
- Use a 2–3 second timer or remote to avoid touching the rig when you take photo.
- Keep straps and cables away from the mount so nothing tugs mid-capture.
- Use the level tool or grid to nail horizon and verticals; this reduces heavy cropping later.
“On busy bridges, wait for lulls or move to a heavier support to avoid passing-vehicle shake.”
Repeat the same shot with identical exposure several times to increase your chance of a perfectly sharp frame.
Troubleshooting ugly streaks, banding, and blue lines in long-exposure night photos
Before sending a photo to support, verify the cause. Run simple, repeatable captures to tell whether the artifact comes from the scene or the device. Two common categories appear:
- Scene/lighting artifacts: flickering LEDs interacting with rolling shutter readout produce jagged, uneven streaks.
- Sensor or software artifacts: banding or blue/purple lines that persist even in controlled captures.
Why flicker and rolling shutter cause jagged lines
Most phone sensors read rows sequentially. If an LED cycles during capture, different rows record different brightness states.
That mismatch makes diagonal or serrated patterns along moving sources, even when the rig is rock-steady.
How to run a proper “blue streak” test
- Place the device on a solid surface and lock framing.
- Shoot in a very dark room. Cover the phone to stop stray spill.
- Take several exposures at increasing durations, and save EXIF for each shot.
Field fixes and decision tree
Quick fixes: reduce exposure time, reframe to avoid direct LEDs, or change angle so bright signs don’t hit the sensor head-on.
Decision tree: if artifacts show only with certain lights, suspect flicker + rolling shutter. If they appear in dark-room long exposures, suspect processing or hardware and retest.
“Repeatable results across multiple captures, not a single image, are the proof you need before contacting support.”
Document persistent problems with EXIF and repeatable shots. Try updates or controlled retests first; then contact the manufacturer if the issue remains.
Polish your light streak photos with editing software
If your composition and trails are strong, careful editing cleans up the few technical distractions and boosts impact. Editing is the right next step when highlights, banding, or small artifact marks draw attention away from the subject.
Start non-destructively and tame blown areas
In Adobe Photoshop, begin by converting the layer to Smart Filters (Filter > Convert for Smart Filters). This preserves the original while you test adjustments.
Apply Shadows/Highlights to reduce over-bright areas without flattening the whole image. Use layer masks to keep changes local to problem areas.
Target small defects, then repair large bands
For stubborn marks use Clone Stamp or healing tools on a new layer. Work at 100% zoom and sample nearby texture so lines stay natural.
If you see larger banding, select the affected region and use Content-Aware Fill to blend with the surrounding background. Repeat the selection if needed for cleaner results.
Final polish: reduce noise and refine color
Apply gentle noise reduction so trail edges remain crisp. Add contrast and selective color to make red and white trails pop while keeping realism.
Keep edits reversible: use layers and masks, compare before/after, and save a versioned file. For a step-by-step example, see this sample edit guide.
Conclusion
Wrap up your workflow by picking a strong location, stabilizing the phone, and testing short exposure variations until you get repeatable results.
Priority order: stability and composition first, then shutter/exposure and ISO, then quick troubleshooting, and finally careful editing to refine the final image.
Before you shoot, use this quick checklist: clean the lens, lock focus, choose appropriate shutter speeds, set a timer or remote, and avoid direct LED sources when possible.
If banding or odd blue lines repeat under controlled conditions, document multiple captures and try software updates or service. For more low‑light tips, see this low-light tips.
Experiment with traffic speeds and exposure choices to develop your style while keeping trails clean and backgrounds natural.