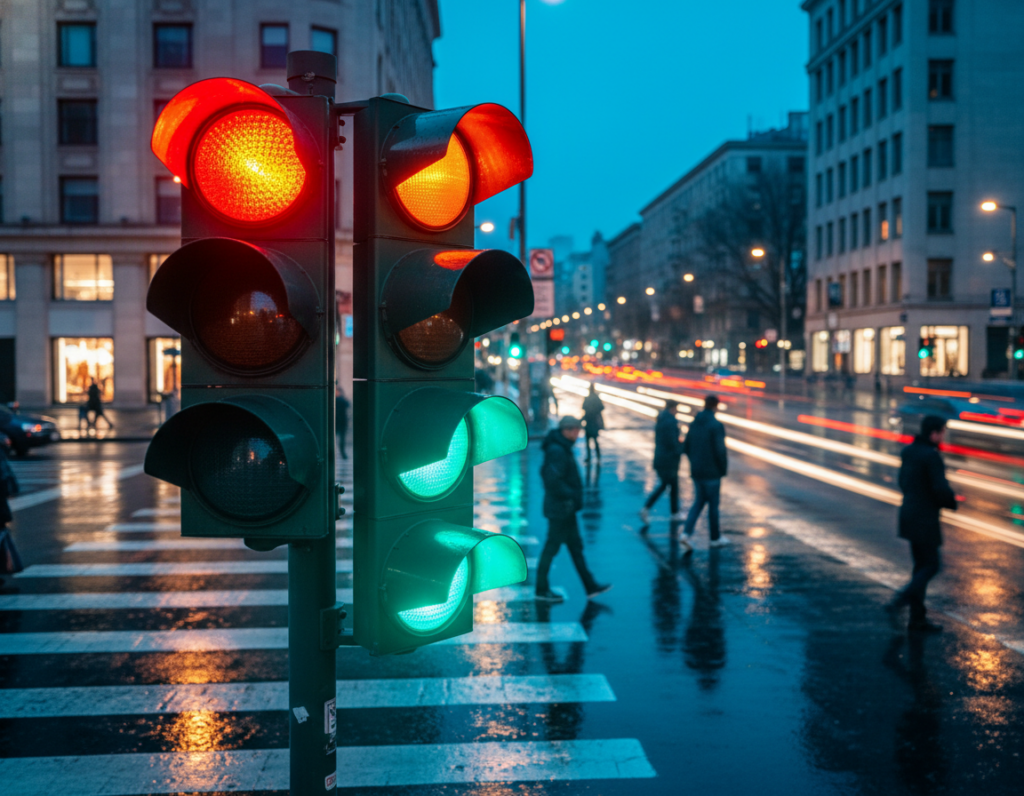
Why night phone photos often look off: Cameras in a phone must either gather more exposure time or push ISO. Both choices can add motion blur or noisy grain and shift color balance, so shots may read as too orange, green, or oddly magenta in street and indoor scenes.
Mixed artificial lighting at night confuses auto white balance. Neon, sodium lamps, and warm bulbs mix temps and can push skin and scene hues away from what you saw in person.
Goal: get more natural skin and scene tones while keeping the mood of night photography intact. We want believable contrast, not a flat, daylight look.
This guide shows a simple workflow: fix things at capture (lens choice, light placement, Night Mode discipline) then follow a short editing sequence for reliable results. It applies to current US phones like iPhone and Android using built-in camera apps and editors such as Adobe Lightroom Mobile, Snapseed, and VSCO.
Trade-offs to expect: longer exposures collect more photons but risk motion blur; higher ISO brightens but adds grain that alters hue and detail. The article will help you balance those limits for better night photos.
Why Low-Light Smartphone Photos Get Weird Colors
Night shooting mixes many competing sources — tungsten spill from an apartment, a sodium-vapor lamp by the curb, LED signage across the street, or passing headlights can all sit in one frame.
The camera’s auto systems try to pick a single white point for the whole scene. In dim settings there are fewer neutral references, so the balance decision shifts as composition or exposure changes. That often produces a global cast that looks unlike what you saw.
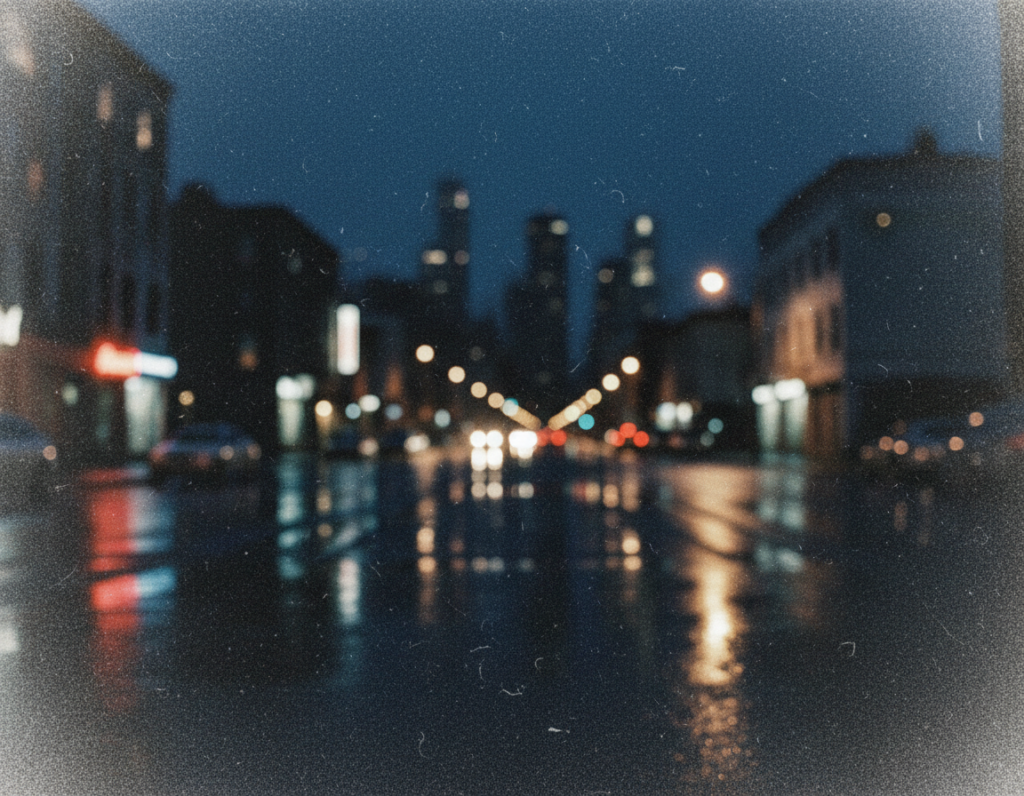
Auto white balance struggles in the dark. Noise in shadow areas adds random color speckles, while the algorithm may flip between warmer and cooler readings as you pan. This makes tones jumpy from shot to shot.
Dynamic range matters, too. Bright lights clip into flat blobs and lose hue detail. When you raise shadows later, noise becomes visible as colored grain, and the scene can gain an unnatural tint. HDR helps some high-contrast cases but can’t always fix mixed lighting.
Many “weird” results begin at capture — exposure, stability, and choosing which source to favor. Aim to protect clean color data in-camera, then use targeted white balance and local edits rather than global tweaks to avoid overfixing the whole frame.
For quick tips on handling odd casts in indoor and travel shots, see this white balance guide.
Set Up Your Shot for More Accurate Color Before You Edit
A little planning at the scene prevents common night photo problems later in editing. When you prepare, the camera can capture cleaner data and save time in post.
Choose the main lens for better performance
Default to the 1x (main) lens for most low light work. Main lenses usually have larger sensors and better processing, so they hold more detail and less noise than ultra-wide or heavy zoom on phones.
Turn off flash to keep skin and mood natural
Flash often creates harsh highlights and flat shadows. For portraits and candid shots, switch it off and use ambient sources instead.
Use nearby or natural sources intentionally
Move your subject closer to a porch, storefront, or a window spill. Even small amounts of natural light at dusk or moonlight help anchor white balance and reduce the camera’s tendency to overcompensate.
- Pick the main lens.
- Scan for mixed lighting and pick one dominant source.
- Position the subject near consistent light sources.
- Simplify the scene before you tap the shutter to get a better photo.
Use Night Mode the Right Way for Cleaner, More Natural Tones
Night Mode captures multiple brief exposures and blends them to lift shadow detail and lower noise. This process happens over a few seconds, so stability matters. The phone stacks frames, aligns them, then merges data to produce a brighter result with fewer speckles.
How stacking affects contrast and color: multi-frame processing can change local contrast and shift hues around bright sources. Tone mapping may warm or cool patches, and aggressive blending can create odd transitions near lights. Watch previews for blown highlights or strange shifts in skin.
When to use — and when to avoid — Night Mode
- Good: static architecture, calm streetscapes, and still portraits where the subject holds position.
- Bad: busy crowds, running kids, pets, moving cars, or wind-blown trees; these cause smear during stacking and motion blur.
How to hold steady for consistent multi-frame results
Brace your elbows, lean on a wall, or set the phone on a stable surface. Hold your breath during the capture and keep framing locked until processing finishes. Small shifts between frames can produce ghosting and uneven tones.
Quick tip: Check the preview right after capture. If skin looks too warm or lights are blown, retake with a slightly darker exposure or change angle. If Night Mode still gives an unwanted cast, try manual controls next for faster fixes.
For deeper technique and advanced tips, read more about mastering smartphone photography at night.
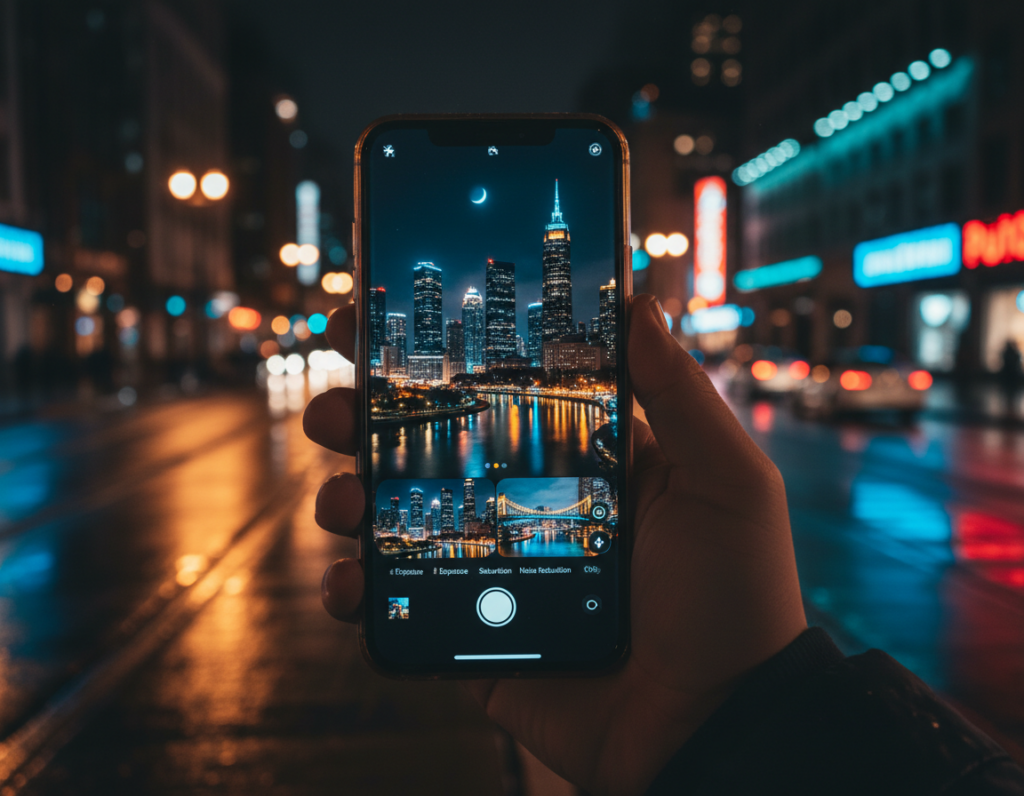
Manual Mode Controls That Fix Color Casts Fast
Using Pro mode stops the app from guessing and lets you pick settings that stabilize the look of a shot. Start by opening the camera app’s Pro or manual mode on most iPhones or Android phones. Prioritize white balance, then exposure compensation, and finally ISO and shutter.
Practical white balance and Kelvin tips
White balance presets help: pick tungsten/incandescent for warm indoor bulbs and daylight for LED-heavy streets. If presets still seem off, use manual Kelvin to nudge the temperature until skin and highlights feel natural.
Protect highlights with exposure compensation
Dial a slight underexposure to save neon and streetlights. Clipped highlights become blobs and cannot be recovered, so take one normal and one darker shot when unsure.
ISO, shutter speed, and motion trade-offs
Higher ISO brightens but adds speckled noise. Longer shutter gathers more photons but can blur moving subjects. Aim to keep ISO moderate and set shutter speed to match subject motion.
Lock focus and exposure to stop hunting
Long-press for AE/AF lock so the phone stops re-evaluating mid-frame. This keeps white balance and exposure stable across compositions and improves repeatability.
- Access manual mode, set white balance first.
- Use exposure comp to protect highlights.
- Adjust ISO and shutter last based on movement.
correct color tones low light smartphone images With a Simple Editing Workflow
A quick, repeatable edit flow fixes most night shots without turning them into daytime scenes. Start by choosing the best file — RAW when available — to keep the most color and shadow detail for recovery.
Why RAW first
RAW preserves latitude. It gives you more headroom to tweak white balance and lift shadows without breaking midtones. That makes subsequent edits less destructive.
Order of operations
- Open RAW or highest-quality file.
- Set global white balance until neutral surfaces look believable, then tweak tint for any green or magenta cast.
- Use local brushes or masks to handle mixed lighting — cool down a warm lamp or neutralize a green patch while leaving skin tones alone.
- Recover shadows slowly to keep authentic night contrast and atmosphere.
- Reduce color noise first, then moderate luminance noise, and finish with selective sharpening to restore fine detail.
“Zoom to 100% on skin and shadow areas to confirm edits improve realism, not just brightness.”
Cleaner captures from stabilization and longer exposures make this workflow faster and less aggressive. Check the file at full view and at 100% to be sure the edits preserve texture and feel like night photography.
Best Mobile Apps for Fixing Night Photo Color
Choosing the right app makes finishing an evening shot faster and more reliable. Pick a tool that fits how much control you need. That keeps edits repeatable and preserves the feel of the scene.

Lightroom Mobile — precision and noise control
Lightroom is the go-to when you want full control. Use temperature and tint sliders for exact white balance, then HSL to tame specific hues.
Masking handles mixed sources: paint over a warm lamp or cool a neon patch without touching skin. Its noise reduction works well on RAW files to keep fine detail and overall quality.
Snapseed — fast, targeted fixes
Snapseed shines for quick, local adjustments. The Selective tool and White Balance are fast ways to neutralize a cast across a frame.
Use the Contrast and Ambience sliders sparingly to keep night scenes punchy without crushing shadows.
VSCO — subtle presets and consistent style
VSCO gives gentle presets that hold skin tones and mood. Pair a preset with small exposure and shadow tweaks for a clean, repeatable finish.
Decision flow: Lightroom for RAW precision and heavy fixes; Snapseed for one-off repairs; VSCO for a cohesive editing style.
Best practice: do core exposure, white balance, and noise work in one app. Finish with minor stylistic tweaks in another if needed. Save a night preset where supported to speed future edits while still adjusting per scene.
Stabilization and Longer Exposures That Improve Color Quality
Steady support is the single simplest upgrade that lifts night photos from noisy to usable. In practical terms, stabilization lets you use longer exposures instead of cranking ISO, which cuts chroma speckles and blotchy artifacts in shadows and skin.
Tripods, mini mounts, and DIY supports for sharper low light shots
Carry a compact tripod or a pocketable flexible tripod for most outings. Mini mounts and clamp-style supports work well on railings and benches.
If you lack gear, rest the phone on a ledge, wedge it against a rock, or set it on a backpack. These simple props provide steady bases that improve capture quality.
Timer, remote shutter, and bracing techniques to reduce motion blur
Use a 2–3 second timer, a Bluetooth remote, or the volume button to avoid tap-induced vibration. Brace your arms and hold your breath if you must handhold.
How longer exposures can lower ISO and reduce color-speckled noise
When the scene is static, choose longer exposures and slower shutter speed to gather more photons. That reduces the need for high ISO and yields cleaner, more natural results.
For moving subjects, accept a faster shutter speed and some added noise, then clean selectively in editing rather than creating smear from motion blur.
Tip: Night Mode benefits from a stable base—consistent stacking gives steadier contrast and truer hues.
Common Mistakes That Create Unnatural Tones
Overdoing edits is the fastest way to make a night shot look artificial. Subtlety wins in evening work. Heavy tweaks steal mood and make skin look odd.
Editing errors to avoid:
- Pushing saturation too far so hues pop unnaturally.
- Overusing clarity or structure, which causes halos and crunchy edges.
- Excessive noise reduction that removes fine detail and texture.
Don’t trust digital zoom or bad framing
Digital zoom magnifies noise and cuts resolution. Move closer or crop later for cleaner results. Bright sources can dominate a frame and force exposure that underexposes faces.
Simple fixes and shooting habits
- Reframe so glaring lights sit off-axis and don’t clip.
- Expose for highlights to avoid flat blobs in lit areas.
- Watch shadows—lifting them too much invites colored speckles that tempt over-smoothing.
- Take multiple shots with small angle or exposure changes; choose the most natural base before heavy edits.
“More color is not the same as better color—aim for believable skin and neutral surfaces while preserving night atmosphere.”
Conclusion
Small choices at capture—stability, which lens you use, and exposure—shape final results more than heavy editing.
, Use the main camera, avoid flash, and pick the right mode: try night mode for static scenes or switch to manual when you need precise control of white balance and exposure.
Protect highlights like street lamps and neon; saving those prevents blown spots and preserves believable contrast. When mixed sources appear, fix them with selective edits rather than a single global sweep.
Lock focus and exposure, stabilize the phone, and keep repeatable settings so you can compare shots. Practice in one familiar street, test night mode versus manual, and check results at 100% to see what gives the cleanest quality.
Final tip: be restrained—avoid heavy zoom and over-editing so the scene keeps its night mood while you remove the most distracting casts.