This guide aims to help you capture vivid neon reflections in puddles with a phone or camera. It gives repeatable steps for rainy city shoots so you swap guesswork for technique.
Low light changes how images form. Handheld shooting can introduce blur and noise, while modern Night mode stacks multiple exposures like a digital long exposure to reveal hidden detail.
You will learn how to scout reflective spots, compose low-angle puddle views, and protect bright color when dialing exposure.
We cover stabilizing your phone, when to trust Night mode, and when to switch to manual controls on iPhone and Android.
Adopt a “look twice” mindset: ordinary street scenes often become dramatic when water acts as a mirror. Treat rainy streets as an advantage—wet surfaces turn the city into a light-catching canvas.
For deeper tips on shooting in rain and refining technique, see mastering rain shots before your next session.
Why rainy city nights create the best neon reflection photos
Wet streets amplify existing lights and make small elements stand out. This change gives urban scenes a punchy, cinematic feel you can compose around.
How wet surfaces amplify light sources
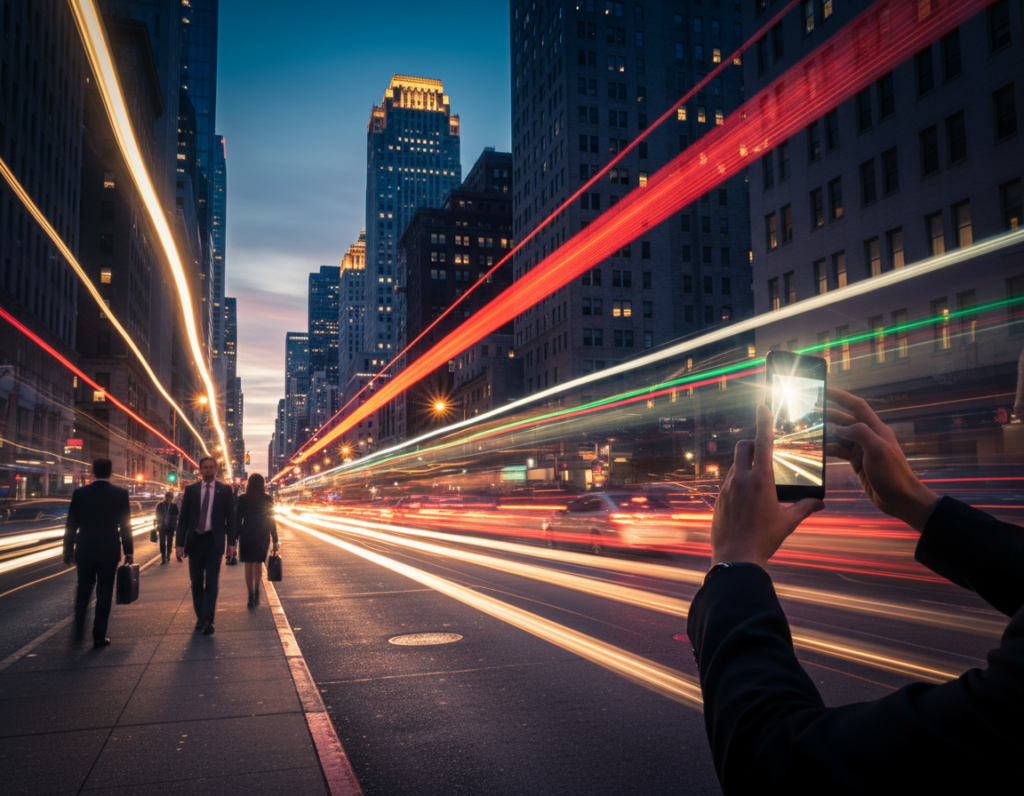
Rain multiplies points of color: signs, shop windows, and streetlamps spread their glow across asphalt and concrete. Wet pavement acts like a dark mirror, which boosts saturation and contrast.
What makes puddles ideal
Shallow, sheltered pools stay smooth and hold clear reflections. These small water pockets are less disturbed by wind than larger bodies, so captured detail stays crisp.
How to “see” compositions after dark
Look for bright spots framed by darker areas. A single lamp or window surrounded by shadow creates a strong focal point.
- Scan for “light islands”—isolated sources surrounded by dark.
- Use wet concrete to boost color without overexposing highlights.
- Let shadows add mood; leaving areas dark makes colors pop.
Scouting the right puddles and scenes in a great nighttime city
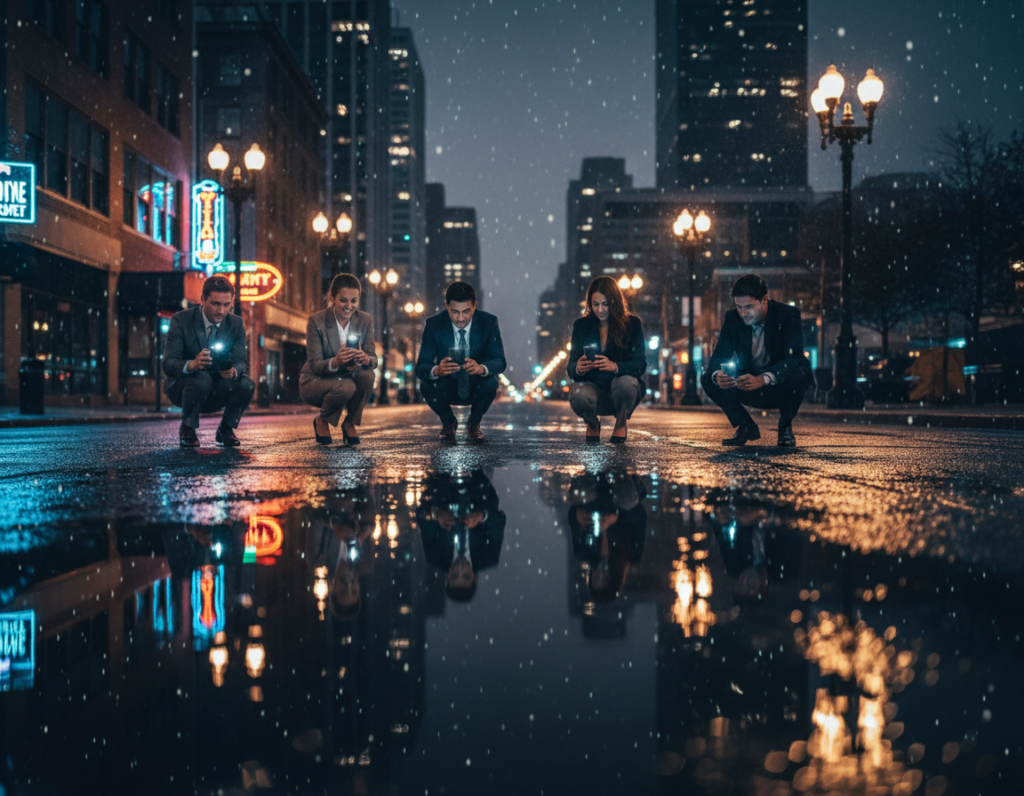
After a rain, the best scenes hide in low spots and under awnings where water gathers like a temporary mirror. Move slowly and look for calm, dark surfaces that catch nearby light without clutter.
Where to look after rain: depressions, roads, sidewalks, and protected areas
Start with depressions in crosswalk paint, uneven sidewalks, pothole edges, alley entrances, and sheltered spots near awnings. These areas often hold the smoothest water for a clean image.
Choosing puddle size and edges for a cleaner transition from subject to reflection
Pick a puddle big enough to frame the subject—roughly a foot across can work. Smooth surfaces give clearer reflections; small ripples blur legibility, which you can use creatively but usually avoid.
- Check for smoothness: still water = crisp image.
- Prefer open edges on roads or pavement for natural blending.
- Avoid pools boxed by curbs if you want a seamless transition.
Alternative reflective surfaces: wet pavement, stone pillars, windows, and shiny streets
Don’t limit yourself to classic puddle spots. Wet pavement, glossy streets, shop windows, and polished stone pillars all expand your composition options.
Safety note (US cities): stay on well-lit sidewalks, watch traffic, and avoid stepping into unknown water near curbs or storm drains.
Composition moves that make puddle reflections look massive
Lower your viewpoint so the water fills the frame; a tiny pool suddenly reads like a sweeping mirror when you get close. Start by bringing your phone or camera almost level with the surface. This single move makes a small puddle look expansive and dramatic.
Get down low: bring your phone close to the water’s surface
Physically lower your stance until the lens sits just above the water line. Use a steady hand and keep the phone parallel to the plane of the puddle for the most convincing effect.
Build the frame: pairing the subject and its reflection
Frame both the real subject and its echoed image so the scene reads as intentional. Align a storefront, sign, or skyline sliver with its mirrored twin to create a complete composition.
Level horizons and straight lines for cleaner urban geometry
Keep horizons level and verticals straight. Symmetry and clean lines make scenes look polished and high-end.
Try unusual viewpoints: crouching, stairwells, and framing with shadows
Use stairwells, curb cuts, or low ledges to change perspective without blocking traffic. Let darker pavement and shadows frame the bright area to reduce clutter and increase drama.
neon reflections puddles smartphone night photography settings for iPhone and Android
Start by choosing the correct camera mode so the phone can blend multiple short exposures into a single clear image.
How Night mode works: Night mode captures a series of quick frames and merges them into one cleaner shot. The algorithm reduces noise and recovers detail, acting like a digital long exposure without a tripod.
Finding and adjusting Night mode
On iPhone, look for the yellow moon icon that appears in low light. Tap it to set a manual duration; handheld captures often run 1–10 seconds while a tripod can extend near 30 seconds.
On Android, open the camera mode menu (often More > Night on some Samsung phones) and select Night. Duration options vary by model; some limit handheld time to a couple of seconds.
When to switch to Pro mode
If the merged image looks smeared, edges feel over-sharpened, or colors turn unrealistic, switch to Pro mode. In Pro mode you control shutter speed, ISO, white balance, and focus for predictable results.
Pro tips: use a slow shutter only when you can stabilize the phone. Keep ISO low to preserve clean color gradients in water and avoid digital artifacts.
Lens limits and why moving closer beats digital zoom
Many phones lock advanced modes to the main lens and use digital zoom for tele shots. Digital zoom often softens detail.
- Prefer moving closer to your subject rather than pinching to zoom.
- Choose a steady stance first, then set exposure length based on how still you can hold the phone.
- When possible, use a small tripod to allow longer, sharper long exposures.
Stability first: how to keep shots sharp in low light and long exposures
Before you tap the shutter, set up a steady posture that minimizes micro-movements during capture.
Steady hand techniques
Train a simple handheld routine: plant your feet shoulder-width, tuck your elbows to your ribs, breathe in, breathe out slowly, then press the shutter gently. This repeatable method helps a steady hand when the mode extends capture time.
Use your environment
Look for solid supports on the street. Lean on a wall, brace against a lamppost, or rest your elbows on a railing. Setting the phone on a bag or coat creates a makeshift platform that reduces wobble.
Tripod or no tripod
Bring a mini tripod when you want guaranteed sharpness or intentional long exposure effects. In very dark blocks, a tripod lets the mode run longer without introducing blur.
Prevent shake with a timer or remote
Use a 3/5/10-second self-timer so your touch doesn’t cause motion. Remote triggers work too: a small Bluetooth remote on Android or the Apple Watch remote shutter for iPhone keeps exposures cleaner and steady.
- Repeatable routine: plant feet, tuck elbows, breathe, then press shutter.
- Bracing ideas: wall, lamppost, railing, bag as a platform.
- Tools: mini tripod, self-timer, remote trigger to cut vibration at capture time.
Master exposure so neon stays vibrant and water detail stays clean
Good exposure is the difference between a flat snapshot and a scene that sings. Control what the camera records so bright signs keep color and the water shows texture.
Tap to focus, then use the on‑screen brightness slider to control exposure.
Tap to set focus and adjust brightness
Tap the reflection or the sign to lock focus. When the slider (sun icon) appears, drag it down to darken or up to brighten.
This simple move tames harsh light and helps the phone preserve fine detail in wet surfaces.
Protect highlights so bright signs keep color
If lettering turns white and loses edge detail, lower exposure until colors return. Reflected light often clips sooner than the real sign, so underexposing slightly can look more natural.
Let darkness shape your scene
Keep surrounding sidewalks and alleys in shadow to add contrast and mood. Shadows guide the eye to the bright area and let the mirrored surface read clearly.
“Underexpose to save color; contrast is your creative tool after dark.”
- Tap to focus, then move the brightness slider to fine-tune exposure.
- Lower exposure if signs lose color or edges wash out.
- Shoot a darker and a brighter frame, then choose the one that preserves water texture and sign color.

Creative upgrades: motion blur, light trails, and painterly night mode photography
Use slow shutter speeds to mix a sharp anchor with fluid motion. Set Pro mode on your phone or camera, then dial a slower shutter so moving elements turn into streaks while the reflected surface stays clear.
Balance shutter and ISO: keep ISO low (for example, ISO 64 if available) to limit noise on dark pavement. Then increase the shutter time only as far as your support allows to avoid unwanted blur.
Use motion blur deliberately: a slower shutter will capture people, rain, or traffic as soft streaks. Aim the frame so one strong sign or bright patch remains readable and anchors the scene.
Turn cars and bikes into painterly strokes. Let headlights and other light sources sweep through the reflected area. You can also use buses, LED signage changes, or passing phone screens to add subtle streaks.
Try short bursts of exposures at varied shutter speeds. One setting often nails the mix of crisp mirror detail and pleasing motion, so bracket your shots and compare.
“Use blur as an accent; keep at least one clear element so the image still reads.”
- iPhone: Halide and Slow Shutter for controlled long-exposure looks.
- Android: Camera FV-5 and ProShot for manual shutter and ISO control.
- Tip: compare a night mode photography frame with a Pro mode long exposure to learn what each mode renders best.
Conclusion
,Wrap up your session with a simple, repeatable routine: scout wet areas after rain, pick one strong light source, get low to the puddle, steady your camera or phone, then protect highlights with controlled exposure.
Use Night mode for quick, reliable low-light results and switch to Pro mode when you need manual shutter or ISO control. Composition still does the heavy lifting—pair the subject with its mirrored twin and keep lines level so each scene reads clearly.
Let shadows add mood; a darker edge makes colors pop. Next time you walk a great nighttime city block, treat every wet surface as a possible mirror and practice often. With the phone camera you carry, rainy streets become a steady way to create bold, repeatable shots.