Goal: keep your night captures looking crisp after upload, not just in your camera roll.
This short guide previews a full workflow: capture choices, low-light techniques, white balance, RAW vs JPEG, editing, export, and platform posting checks.
What does “sharp” mean on social feeds? It means clear edges, readable texture, controlled noise, and no smeared detail after resizing. Good sharpness starts when you shoot.
Expectations matter. Export cannot fix motion blur, missed focus, or extreme noise. You can rescue detail with careful edits, but capture quality sets the ceiling.
Different platforms and placements treat images differently. Feeds, Stories, and Reels resize and recompress. Choose export choices that anticipate those limits.
The guide uses present-day phone capabilities like Night Mode, Pro controls, RAW capture, and modern mobile editors. Follow the sequence here and you’ll get the best results for social sharing.
Key takeaways: prioritize capture, use appropriate low-light techniques, and pick export choices that match each platform’s needs.
Why night smartphone photos look soft after you post them
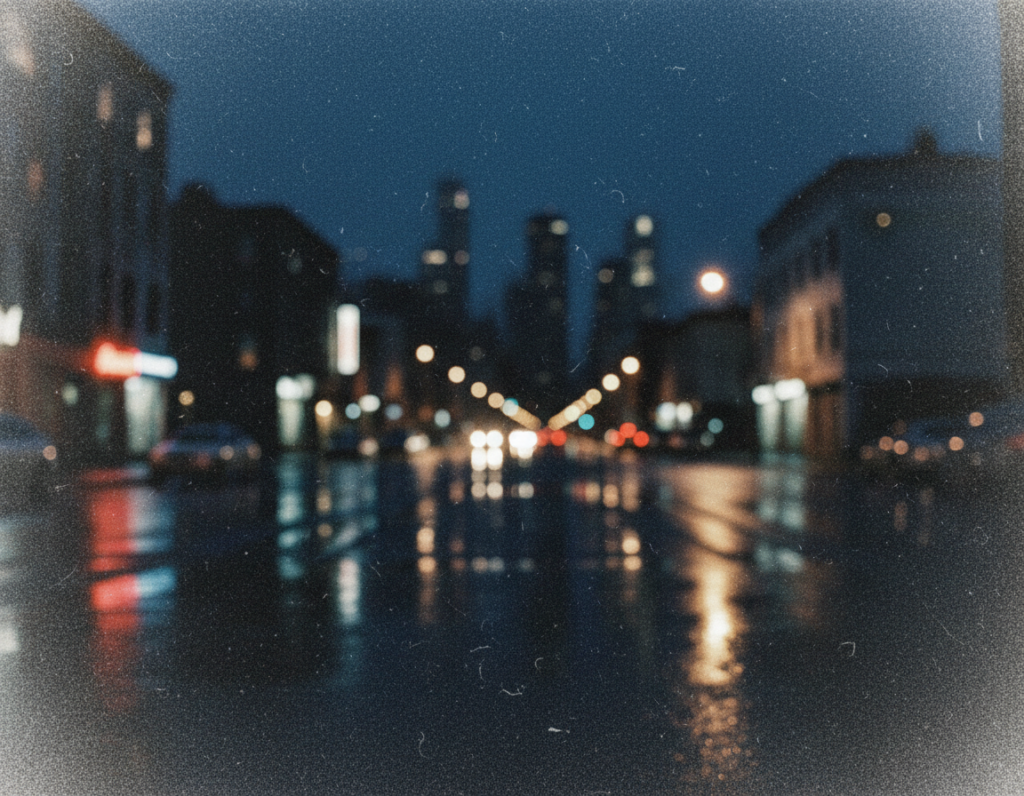
Low-light captures often look softer after upload, and the reasons are both optical and digital.
Physics first: in dim light the camera must choose—hold the shutter longer or raise ISO. Longer shutter time can cause motion blur. Higher ISO brightens the image but adds grain that reads as reduced clarity.
Social apps then downsize and recompress images. A snug preview on your phone can hide problems that become visible after scaling. Fine texture like hair, brick, or foliage gets smeared and compression makes grain look worse.
Mixed lights also hurt perceived detail. When different color temperatures collide, auto white balance may flatten local contrast and make edges feel muddy.
“Softness after posting is usually a chain: capture limits → processing → resizing.”
- Motion or missed focus?
- Noise reduction smearing detail?
- Platform resizing or heavy recompression?
Quick diagnosis: view the full-size image, check EXIF for shutter speed, and zoom at 100% to see if grain or blur is the cause. Because most softness starts at capture, the next section explains how to stabilize your phone and choose the right mode for crisper results.
Capture for sharpness first because export can’t fix motion blur
The clearest uploads begin the moment you press the shutter with a stable setup. Stabilization is the single most important step for crisp night results. A small tripod or solid stand lets the sensor use slower shutter speed without losing texture.
Why motion blur is often unfixable: when movement smears detail across pixels, sharpening only increases contrast around the smear. You lose real information that editing cannot recreate.
- Stabilization options — best to improvised: full tripod, mini tripod on a ledge, brace against a wall, or rest the phone on a backpack.
- Stop tap shake — use a 2–3 second timer, the volume-button shutter, or a cheap Bluetooth remote (CamKix, UBeesize models work well). This matters more when exposure speed drops.
- Lens care — wipe the lens with a microfiber cloth and remove reflective cases to cut haze and flare around bright lights.
- Avoid digital zoom — move closer for better detail; cropping in-camera forces upscaling and worsens compression on social images.
“Capture more real detail upfront and you’ll need lighter sharpening later.”
Use the best lens and mode for low light
Choosing the right lens and mode makes a bigger difference than any edit when light is low. Start by favoring the main 1x lens: it typically pairs with the largest sensor area and cleaner processing. That combination preserves texture, contrast, and fine detail better than ultra-wide or heavy zoom options.
When to trust Night Mode: use it for static scenes or handheld shots where the phone can stack frames. The multi-frame approach reduces noise and brightens shadows if you stay steady for the capture.
When to choose Pro/Manual: switch to manual when subjects move, or when bright streetlights clip highlights. Manual control helps you lock shutter and ISO to avoid motion blur or blown speculars that stacking can smear.
- Main lens first: cleaner sensor readout and better low-light algorithms.
- Try Night Mode: good for static scenes and handheld support.
- Use Pro mode: better for motion, tricky highlights, or precise exposure control.
“Start on 1x → test Night Mode → switch to manual if highlights blow or motion smears.”
Dial in exposure settings that protect detail at night
Control how much light hits the sensor to protect texture and highlights.
ISO guidance for phones
Keep ISO moderate. Higher ISO brightens but adds grain that reduces apparent clarity. Aim to stay under ~800 when possible for the cleanest results.
If ISO creeps higher, you will see noisy, smeared texture after the camera’s noise reduction. That looks worse than a slightly darker image you can fix later.
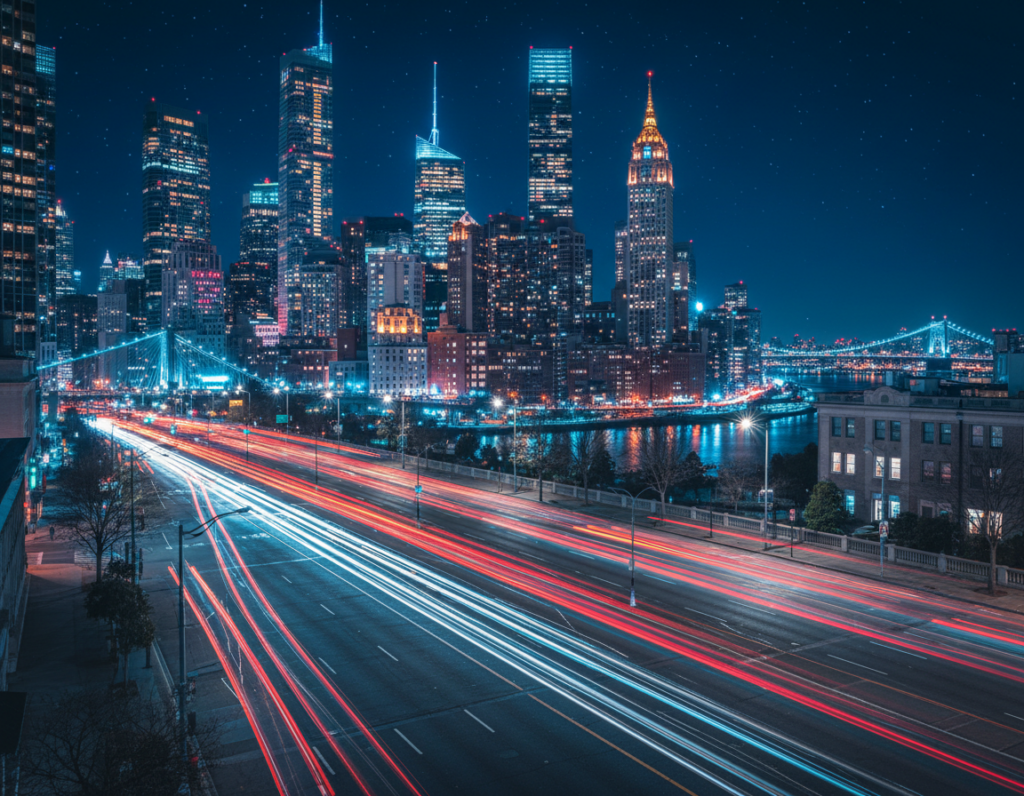
Shutter speed and long exposure
Think of ISO as amplification and shutter as collection. A longer shutter lets the sensor gather more light but increases risk of motion blur.
Use a tripod or solid surface plus a 2–3 second timer to take longer exposures without blur. For moving subjects, raise shutter speed to freeze motion and avoid loss of detail.
Slight underexposure to protect highlights
Underexpose a touch when bright street lights or neon are in frame. It is easier to lift shadow detail than to recover clipped lights that show as white blobs.
Lock focus and exposure
Tap-and-hold to lock focus and exposure so the camera stops hunting mid-capture. Hunting causes inconsistent brightness and softness between frames.
“Take 2–3 test frames at different exposures to choose the cleanest result.”
- Trade-off: ISO amplifies, shutter collects—balance both for little grain and minimal motion blur.
- Target ISO range: keep under ~800; above that expect more grain and aggressive smoothing.
- Test frames: shoot 2–3 variations to verify brightness, focus, and motion before finalizing.
Set white balance and lighting for clearer edges and cleaner color
Color and light control are the quiet tricks that make edges read crisper after upload. A neutral white point and thoughtful placement of light reduce visual noise and help local contrast read as detail.
Correct yellow casts with manual white balance
Artificial bulbs often push warmth. If sodium or tungsten light dominates the scene, cool the white balance slightly in-camera or in your editor to restore true whites. Neutral color helps edge contrast so textures look more defined.
Use soft, diffused fill and bounce
Soft light lifts shadows without adding harsh highlights. Hold a small white card, napkin, or portable reflector to bounce nearby light onto the subject. This reduces deep shadows and preserves midtone detail for better perceived clarity.
Why phone flash usually hurts texture and depth
Direct flash can flatten the background and create hot spots that wipe out texture. Avoid the phone flash when possible and favor available light sources like storefronts or street lamps to shape form without harsh contrast.
“Balanced color and controlled shadows mean less heavy editing later, which helps your images survive platform compression.”
- Position subjects near public light to add depth without blowing highlights.
- Use slight WB cooling for yellow casts from street lights.
- Diffuse or bounce light to soften shadows and keep texture.
Choose RAW vs JPEG based on how much editing you’ll do
Deciding between RAW and JPEG depends on how much post-capture work you plan to do. Pick the file type that matches your workflow and the level of control you need over shadows and color.
RAW for maximum shadow and color data
RAW retains far more data from the sensor, which helps recover shadow detail and correct tricky white balance under mixed light. This gives you greater flexibility during editing without killing image quality.

Many third-party apps like Lightroom mobile and some default camera apps support RAW capture. Expect larger files, slower burst speeds, and more storage use. But the trade-off is better latitude when adjusting exposure and color.
JPEG when speed matters and edits are minimal
JPEG is smaller and faster. Use it for quick sharing on social feeds, well-lit streets, or when you don’t plan heavy editing. The file is ready to post and saves space on your phone or camera.
- Practical difference: RAW preserves more shadow and color detail than JPEG.
- Trade-offs: RAW = larger files and slower processing; JPEG = speed and convenience.
- Workflow tip: Shoot RAW for hero images you’ll edit; keep JPEG for routine documentation.
- Post-edit caution: RAW still needs careful noise reduction and careful sharpening to avoid artifacts.
“Shoot the best quality you can when it matters, and save time when it doesn’t.”
Edit for crisp night detail without creating halos
Start editing by calming noise where it hurts most, then coax texture back with subtle contrast. Work in a clear order to protect real detail and avoid obvious artifacts after upload.
Begin with a tidy workflow
Order matters. Correct exposure and white balance first. Then target noise reduction, restore micro-contrast, and finish with selective sharpening.
Selective noise reduction and micro-contrast
Apply noise reduction mainly to deep shadows where grain is worst. Preserve midtones so texture remains natural.
Micro-contrast is the small local contrast that makes brick, metal, and fabric pop without global sharpening.
Sharpen carefully and shape tones
Sharpen edges and the main subject only. Avoid boosting skies or noisy corners where halos appear after compression.
Lift shadows gently, protect highlights, and add moderate contrast so the scene keeps depth and mood.
Fix mixed light and keep a consistent feed
Correct local color casts to preserve the scene’s atmosphere, not to neutralize it completely. Use a preset for feed consistency, then fine-tune each image at full-screen to check results.
“Noise first, then micro-contrast, then selective sharpening — this order saves detail and avoids halos.”
- Exposure / white balance → noise reduction → micro-contrast → selective sharpening
- Target reduction: deepest shadows; protect midtones and highlights
- Use light “screen” sharpening after any resize and check on a phone screen
export settings sharp night smartphone photos for social media
The final file you create determines how much real detail survives app recompression. Start with a clean, high-quality master and aim to give platforms the least work possible.
Format guidance
Use high-quality JPEG for posting. Social platforms recompress images, so a dense, well-compressed JPEG reduces visible damage.
Keep TIFF only as a master for printing or archiving because file size is large and often unnecessary for feeds.
Quality and compression
Set export quality near the top of the slider (90–100 or equivalent). This protects hairline texture and small signage detail in low light.
Resolution and sharpening
Resize to platform-friendly pixel dimensions so the app does less rescaling. Then apply light “screen” sharpening after resizing.
Color handling
Maintain consistent color management in your editor so neon, skin tones, and blacks look the same on a phone screen. This preserves perceived sharpness across uploads.
- Core rule: start with a clean, high-quality JPEG to limit recompression harm.
- Export at platform sizes to avoid heavy in-app resizing.
- Sharpen lightly after resize; save a TIFF or RAW master for future edits.
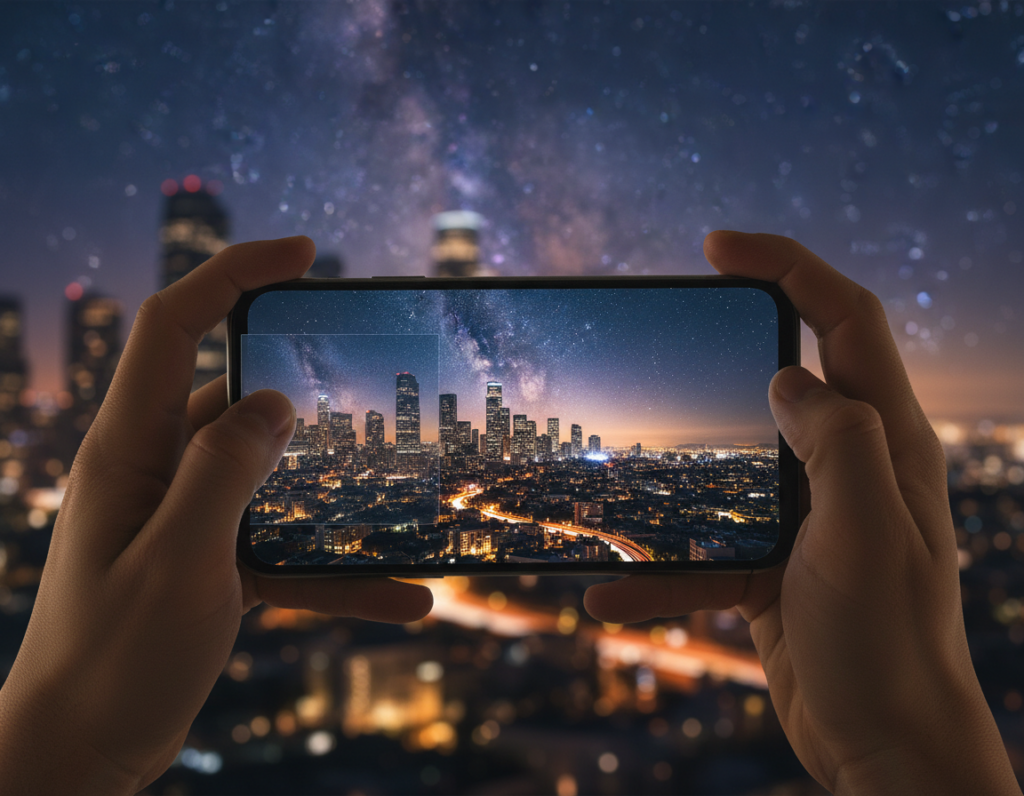
Platform-aware export tweaks that help images stay sharp
Where you plan to post changes how your file looks. Feed posts, Stories, and Reels use different crops and compression. That changes how tiny detail and edges read on a phone screen.
Feed vs Stories and Reels
Aspect ratio and scaling matter. Feed squares and tall Reels resize differently. Plan crops so faces, text, and key highlights stay inside the safe area before you save the final file.
Avoid double compression
Do your full edits once, then export the final master. Re-saving in another app or using in-app filters adds another compression pass. That second step softens detail and lowers final results.
Quick test-post routine
Upload one representative night photo to your account and view it on a phone in normal lighting. Check brightness, sharpness, and composition. If it looks right, save a platform-specific preset to save time for future content.
- Plan crops for the placement so subjects stay visible.
- Edit once → export once → upload without extra in-app edits.
- Test a single shot, verify on a phone, then roll out the rest.
Upload high-quality Instagram Reels guides can help you set platform-specific presets and speed this workflow.
Posting checklist for the sharpest final upload
Quick checks before you hit post save time and avoid re-doing edits later.
Run a final check on each frame at full-screen so you catch detail problems that thumbnails hide.
Confirm the main subject is tack-sharp at full-screen view
Verify focus at 100%: zoom in on the face or subject to confirm edges and texture read clearly on your phone and desktop.
Don’t rely on tiny thumbnails. A shot can look fine small but fail when the app resizes it.
Re-check noise, shadows, and bright lights after resizing
Post-resize review: resize the file to the platform dimensions and then scan for smearing, banding in shadows, or halos around lights.
Look for clipped streetlights or neon that became white blobs. Adjust exposure or local highlights if needed.
Save a master export for reuse and re-crops
Keep a high-quality master file so you can re-crop for feed, story, or reels without re-editing from scratch.
Use a clear naming/album system on your phone to speed uploads and avoid selecting a preview or screenshot by mistake.
- Check focus at full-screen on your phone and desktop.
- Resize to the target dimensions, then inspect noise and shadows.
- Run a highlight audit for streetlights, neon, and speculars.
- Save a master file and use consistent naming in an album for speed.
“Stable capture—tripod, timer, or a remote button—reduces the heavy editing that often breaks after upload.”
Conclusion
The best way to keep detail is to build a repeatable process from capture to final upload. Stabilize with a tripod or firm support, prefer the 1x camera and lock focus, then balance shutter and exposure to control motion and grain.
Blue hour often gives friendlier light and an easier sky to handle than deep night. Use a neutral white balance and a gentle editing approach so local contrast survives platform compression.
There is no magic export: motion blur and missed focus usually cannot be fixed. Test one file on your phone and adjust dimensions and sharpening until the test post looks right. That simple loop will help photographers make reliable, repeatable results.