This short guide shows how to take control of white balance on your phone so urban night photos feel intentional and real.
White balance and Kelvin are practical terms that tell your camera how warm or cool lights should look. Get them right and neon, skin tones, and streetlights read as cinematic or neutral rather than oddly orange or blue.
The core problem after dark is mixed lighting. A phone camera often guesses the dominant light and gets inconsistent results. This guide promises a clear workflow: identify light sources, set your phone to Pro mode, pick Kelvin or manual white balance, balance exposure, stabilize, focus, compose, then fine‑tune in editing.
Expect realism, not daylight. The aim is believable night scenes with controlled tones. Steps apply to iPhone and Android devices using built‑in Pro controls or third‑party apps.
Field rule to repeat: protect highlights first, then set the main white balance, and fix local mixed light during edits.
Why color temperature matters in night street photography
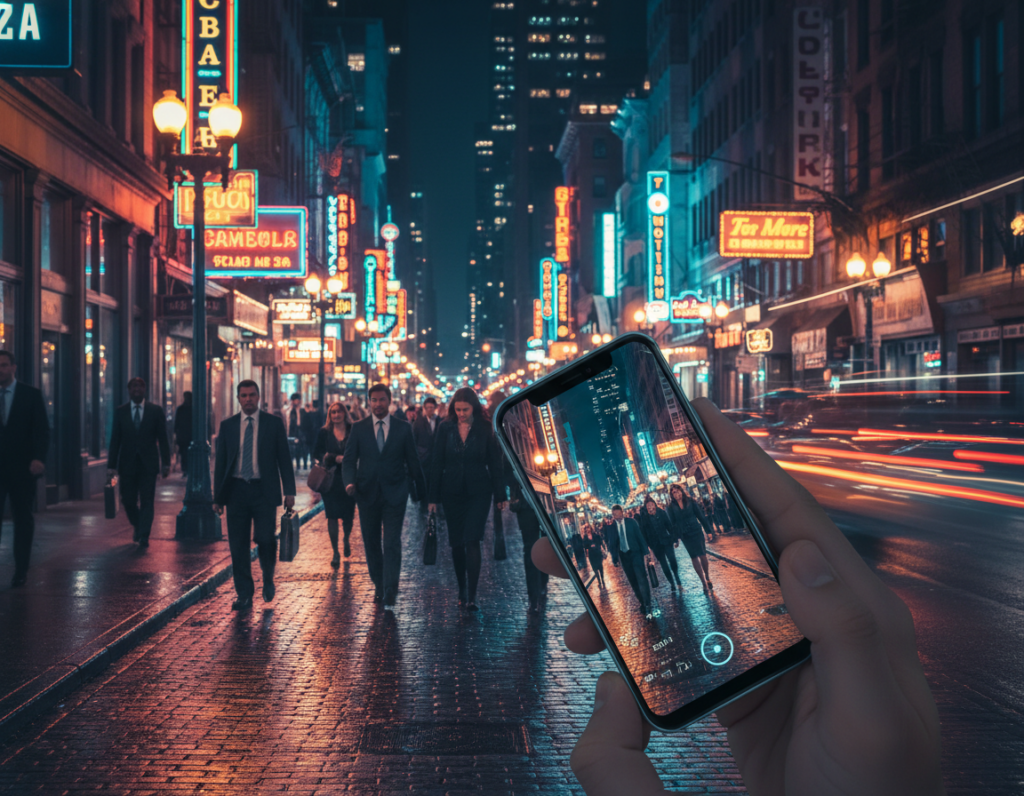
City lamps and signage mix wildly after dusk, and that mix defines how a frame reads emotionally. Artificial light types—sodium vapor, warm LEDs, cool LEDs, neon, and window glow—often sit in a single view and instantly shift the mood.
Those differing light sources cast competing tints on faces, sidewalks, cars, and façades. That means a single perfect white balance rarely exists for the whole frame. Faces might look natural while nearby signs throw an unnatural hue.
Phone auto modes tend to chase the dominant lamp as you reframe. The result is that familiar blue‑to‑orange flip between shots, which ruins consistent images and confuses viewers.
Decide on a dominant light to set a global balance, then treat remaining casts with local edits. This keeps a consistent look across a series and helps photographers tell a clear visual story: warm tones for calm, cooler tones for tension.
- Pick the main lamp to balance globally.
- Protect highlights first so lights don’t clip.
- Fix mixed casts locally during editing for consistency in your images.
Know your night lighting in the United States
Urban nights combine multiple light sources that compete for attention and change how skin tones and surfaces read. Typical US blocks include lampposts, neon signs, store windows, bare bulbs, and moving car beams. These elements create the base for how a frame will be judged.
Warm lamps and tungsten-like glow
Municipal lamps often cast a warm amber. Phones on auto may cool the whole frame, tipping skin tones toward blue.
Neon, storefronts, and LED shifts
Neon and shop windows act as strong color emitters. LEDs vary by fixture and city, which makes a visible difference from block to block. Saturated signs can overpower neutral objects and faces.
Headlights and moving sources
Passing cars bring sudden highlights and brief hue shifts. Brake lights can clip highlights at the frame edge and ruin one exposure in a burst.
- Scan the scene: pick dominant and secondary lamps, note moving lights.
- Respect deep shadows; they keep atmosphere and depth.
- Field examples: a crosswalk under warm lamps with a cool LED billboard nearby; a subject by a storefront with passing cars adding flashes.
Set your phone up for accurate color before you shoot
Good captures start with simple camera habits you can set in seconds. These quick steps help your phone record cleaner data so later edits behave predictably.
Use the main lens for cleaner low light results
The 1x or primary lens usually gives lower noise and truer tones than ultra‑wide or digital zoom at low light. That means more accurate white rendering and fewer artifacts to fix later.
Turn off flash unless you want a harsh, flat look
Phone flash floods the foreground and leaves backgrounds black. That kills ambient mood and skews how lights read. Leave it off unless you deliberately need that hard fill.
Enable RAW for more flexibility
Shooting RAW preserves color information and shadow detail. You can change white balance and lift shadows with less banding and less color damage than with JPEGs.
- 30‑second checklist: clean the lens, switch to the main lens, enable RAW/ProRAW, disable flash.
- Turn on grid lines and the histogram if available to protect highlights under lamps and signage.
- Use native Pro mode or a trusted manual app when the stock app lacks white balance lock and Kelvin control.
Next: With clean data captured, you can confidently set Kelvin and exposure without the phone fighting your decisions.
adjust color temperature night street photography smartphone in Pro mode
“Lock the white balance and you stop chasing the light.” Use Pro mode to make that a practical habit. Manual white balance and RAW give control while auto modes keep changing as you pan.
When to use Kelvin vs presets
Presets (Tungsten/Fluorescent/Daylight) are fast on the street. Pick them when you need speed and a predictable shift.
Dialing Kelvin is better for fine control. Start around 2800–3500K for warm lamped blocks and 4000–5000K for LED‑heavy areas. Tweak by eye and check the histogram.
How to lock white balance
Open Pro/manual mode, set WB or Kelvin, then use the app’s WB lock or “hold” function. If your app lacks a labeled lock, tap the WB readout and save the setting.
Test one frame, pan, and confirm skin tones and whites stay steady. If they shift, re-lock before shooting the series.
Handling warm lamps and cool LEDs
Choose a dominant light for your subject. Set global white balance to that source and accept mixed background hues as part of the mood.
For neutral results, balance to a true gray or white surface in the same light as your subject. Beware false neutrals like painted walls or signs reflecting neon.
Quick field targets and a mini workflow
- Targets: sidewalks, white signage, concrete — use these for neutral checks.
- Mini workflow: set WB → lock WB → shoot a test → check skin/sidewalk/whites → fine‑tune in small steps.
- Deliberate choice: sometimes keep warm lamps warm to preserve atmosphere.
For deeper reading on handheld techniques and control, see this practical guide: mastering smartphone photography at night.
“Protect highlights first, then set the main white balance.”
Balancing exposure and white balance for realistic night color
Letting the brightest lights dictate exposure saves their hue and detail. Slight underexposure keeps lamps, LED signs, and neon from clipping. Once a highlight blows out, its color and texture are gone.
Why slightly underexposing protects bright highlights
Streetlights and signage clip quickly because sensors hit their maximum value. Clipped pixels turn white and you cannot recover accurate color in editing.
Practical rule: expose for the brightest important highlight, then accept deeper shadows to keep a real look.
How ISO and shutter influence noise and saturation
Keep ISO moderate—roughly ISO 400–800 when possible—to limit color speckling and desaturation in shadow areas.
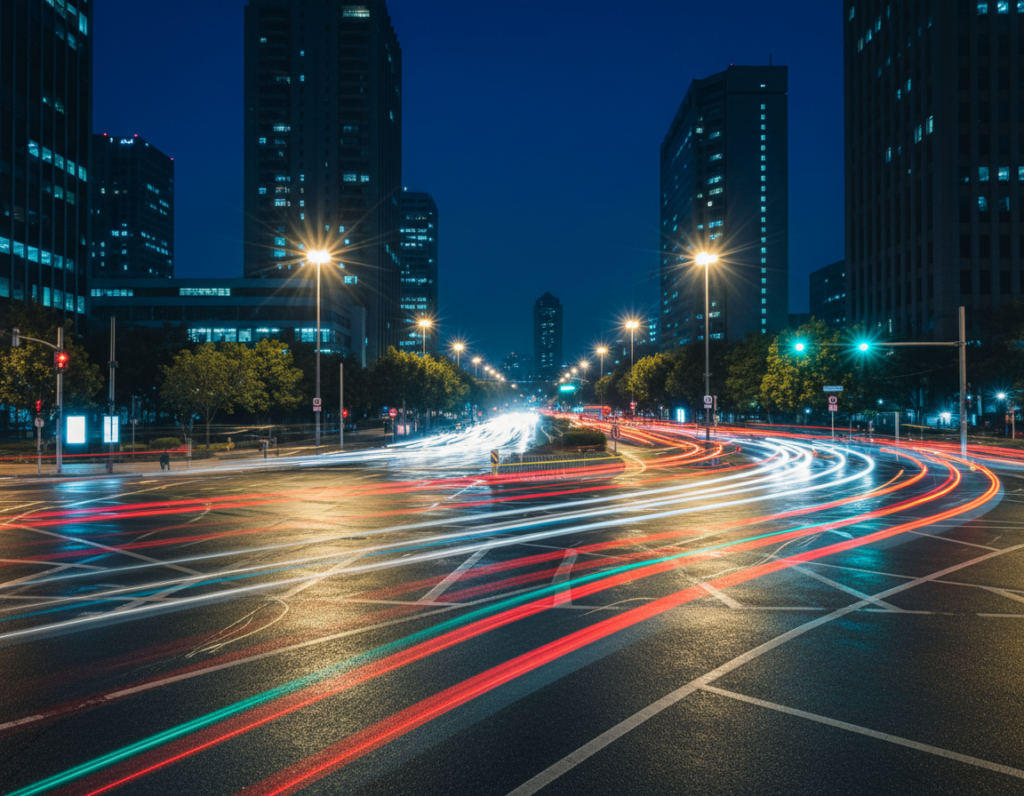
Shutter speed affects blur and how moving lights render. A slower shutter creates streaks and smoother highlights; a faster shutter freezes motion but may force higher ISO.
Using exposure compensation to keep scenes looking like night
Use negative EV in semi-auto modes to stop the camera from brightening the scene into day. Check the histogram and highlight warnings to protect detail where night color lives.
- Decision table: static scene + support = slower shutter, lower ISO.
- moving subject = faster shutter, accept higher ISO and faster exposure time.
- Remember: lifting shadows too far strengthens casts and makes balance harder to fix later.
“Expose for highlights first; let shadows hold atmosphere.”
Night Mode versus manual settings for better color
When a device builds a final image from several frames, it can smooth noise but also alter local contrast and hue. That process often gives usable results fast, but it trades strict control for cleaner files.
How multi-frame stacking can change contrast and tone
Behind the scenes, Night mode stacks many short exposures, aligns them, denoises, and tone maps for a single output. This reduces grain and lifts detail.
Those steps can also neutralize warmth, push greens or magentas under varied LEDs, and mute local contrast in highlights or shadows.
When to trust automated captures
Trust Night mode for quick handheld shots in mostly static scenes. If your subject and background stay still and the phone can hold for several seconds, the results are often excellent.
When manual control wins
Use Pro/manual when you need consistent white balance across a series, when lights dominate with a tungsten hue, or when motion will cause ghosts.
- Hybrid approach: shoot one stacked frame for scouting, then switch to manual WB lock and set exposure for final images.
- Field test: capture one automated frame and one manual frame. Compare skin tones and signage whites to pick the best technique for the scene.
“Use stacking for convenience; use manual for consistency.”
Stabilization techniques that protect sharpness and color detail
Steady framing is the unsung shortcut to cleaner tones and sharper detail. Stability lets you use longer exposures and lower ISO, which cuts chroma noise that mars shadows and gradients. That improves both sharpness and true tonal rendering.
Tripod and pocket supports for longer exposures
Carry a compact tripod or clamp mount for planned stops. A mini tripod fits a pocket and makes long handheld shots unnecessary.
When you need to move, use a quick “pocket support”: brace the back of the phone against a railing, trash can, or wall. That simple support often beats shaky hands.
Using a timer, remote, or volume button to prevent shake
Set a 2–3 second timer or use a Bluetooth remote so you don’t jab the screen. You can also press a volume button or use wired headphones as a shutter release to reduce micro‑shake.
- Elbows in, exhale, press the device to a fixed object, then trigger gently.
- Less frame drift helps stacking modes avoid blur and strange color blending.
- On sidewalks in the United States keep gear minimal, avoid blocking paths, and never leave your phone on unstable ledges.
“Stabilize first; then lock white balance and fine‑tune exposure without losing detail.”
Focusing in low light without color and contrast surprises
Dim scenes make the camera search for edges that may not exist. Phones and small cameras can hunt when light and contrast are low, so you need a reliable way to stop it.
Lock focus to stop hunting under streetlights
Tap-and-hold or use the AF lock in Pro apps to freeze focus before you recompose. Locking prevents the lens from snapping to a bright lamp or a passing headlight during longer exposures.
Choose a focus point that keeps the subject away from deep shadows
Pick an edge with clear contrast on the subject — a jacket seam, the rim of a face, or sign lettering. Avoid flat dark zones that give the camera no reliable cue.
- Why hunting happens: low contrast, glare, and moving highlights confuse autofocus.
- Shallow depth of field: portrait modes and wide apertures make focus errors more obvious.
- Troubleshoot: if focus fails, move the box to a brighter plane at the same distance, lock it, then shoot.
Keep the subject separated from deep shadows to boost perceived sharpness and keep tones stable.
Remember: when the focus shifts, the camera often re-meters exposure and that can change saturation and white balance. Stable focus means steadier color and more consistent results for photographers out on the block.
Composition tricks that make night color look intentional
Use composition to turn chaotic light into a purposeful image. Small framing choices guide the viewer to the important tones and keep the frame from feeling accidental.

Reflections from wet pavement double your available light and make colors read stronger without raising ISO. Lower your viewpoint and align a puddle so it mirrors the main subject. This often gives the scene a cleaner, more dramatic feel.
Building contrast with reflections on wet streets and puddles
Reflections boost saturation and create natural leading lines. Place the reflected highlight near the subject to bind foreground and background. Avoid clutter that competes with the mirrored shapes.
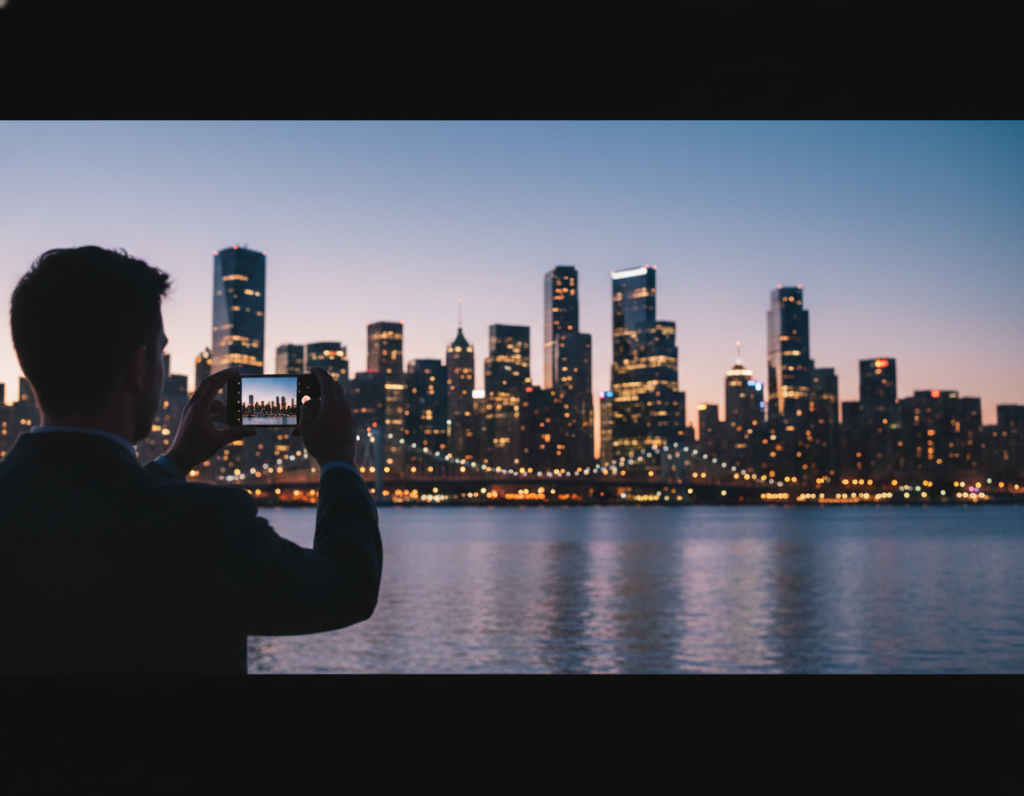
Using side light and backlight to shape subjects
Side lighting reveals texture — brick, denim, steam — and builds depth. Backlight outlines the subject and separates them from the background. Both techniques increase perceived contrast and make tones look deliberate.
Letting shadows stay dark for atmosphere, depth, and realism
Keep deep blacks where they belong. Letting parts of the frame remain dark makes highlights pop and preserves mood. For mixed lighting, place warm and cool zones apart so contrast reads intentional.
- Framing tip: shoot sequences — small angle shifts change which light hits the subject.
- Use reflections to double impact without added noise.
- Keep compositions simple so the photo tells a clear visual story.
“Night should look like night — keep the darks and let the highlights sing.”
Editing workflow to fine-tune color temperature in night street photos
Treat noise first, then shape the look—this keeps images honest. Start with targeted noise reduction so sliders later don’t produce a plastic result. That protects edges and keeps lights crisp.
Mobile-to-desktop order: noise reduction → exposure/contrast → white balance → local fixes → sharpening/export. Follow this to preserve tonal range and mood.
Selective noise reduction before heavy grading
Target deep shadows where chroma speckles live. Use masking so lamps and signs stay sharp. Aggressive global denoise makes skin look waxy—avoid that.
Global then local white balance fixes
Set a global white balance using a neutral area or believable skin tones. Next, use local masks in Lightroom or Snapseed to cool LED zones or warm faces hit by spill.
Recover shadows and avoid common artifacts
Lift shadows sparingly. Too much recovery flattens contrast and reveals ugly noise. Watch for halos from clarity or dehaze, and for oversaturated neon that bleeds.
- Export tips: keep enough resolution for social crops and avoid filters that shift white balance unpredictably.
- Checkpoint: compare before/after—blacks should stay black, highlights keep detail, and the overall white balance matches the mood you saw.
“Start with selective fixes; then finish with precise local edits.”
Conclusion
Good night results come from a chain of small, deliberate steps. Follow the core workflow: identify dominant light sources, set the phone to use the main lens and RAW, keep flash off, then lock white balance and manage exposure for highlights.
Protect highlights first. Once street lamps and signs clip, their hue and detail are lost. Slight underexposure and steady framing save the most important data for later editing.
Make Pro settings your repeatable habit: lock white balance, hold exposure steady across a series, and accept deep shadows so scenes read like night, not day.
Stabilize whenever possible. Mind shutter speed for motion, keep ISO low when you can, and use a tripod or pocket support for long exposures.
Action plan: pick one block with mixed LEDs and warm lamps, shoot three angles with locked balance, do a light edit pass, and compare images. Use this guide as a checklist until these tips become automatic on every shoot.