This guide helps photographers and casual users pick the right way to save photos after editing. Choosing the proper file type affects color, compression, and how much detail survives post-processing.
Smartphone cameras now capture high-quality raw files and versatile JPGs. RAW and DNG keep all sensor data for heavy image editing. TIFF and PSD are common when printing or preserving layers on a computer.
We will cover how settings in software like Adobe Lightroom change file size and quality. You will learn when smaller files suit email or web use, and when larger files help printing or archiving. This short guide sets up the technical terms you need to weigh compression against color fidelity and detail retention.
The Importance of Choosing the Right Export Format
Choosing the right file type directly affects how your photos load and how they are perceived by buyers. A poor choice can slow pages or reduce image quality, and that hurts conversion on e-commerce sites.
Orbitvu and similar services show that automatic adjustment of compression can tip the balance toward faster loading or higher visual fidelity. For product listings, a careful trade-off between compression and clarity keeps shoppers engaged.
The web still favors JPG for compatibility and small file size, but other image formats may preserve more detail for print or high-end displays. Consider the destination: social feeds, storefronts, and print all need different settings to keep your work true to intent.
“An image that is too slow to load or poorly adapted to mobile displays can negatively impact user engagement.”
- Selecting the right file keeps your visual work consistent across devices.
- Mind compression and file size to preserve perceived quality.
- Export with the final use in mind — web needs differ from print needs.
Understanding the Best Image Export Format Photography Standards
How you save photos after shooting decides whether subtle tones and shadow detail stay intact. This section explains why working with raw files matters and how newer standards change web delivery.
RAW and DNG Workflow
RAW files keep all sensor data, giving photographers maximum headroom for color correction and heavy editing. Professionals favor this capture path for retouching, grading, and printing.
Adobe created DNG to standardize access to raw data. That helps with long-term archives and cross-software compatibility.
The Role of HEIF and Modern Standards
New standards aim to shrink file size while holding quality. HEIF simplifies efficient storage on phones and supports richer color than legacy jpgs.
WebP and AVIF push the web forward. WebP blends good compression with transparency support. AVIF often achieves smaller files at equal or better quality.
- RAW is the capture gold standard for detail and editing room.
- DNG secures access to proprietary raw data over time.
- WebP and AVIF cut file sizes for faster pages without harsh quality loss.
Comparing Lossy and Lossless Compression Techniques
Compression choices decide how much visual detail and tonal subtlety stay in your files. This affects final quality and whether banding, artifacts, or soft edges appear after editing.
Lossy compression, like the familiar jpg approach, trims data to cut file size. That makes files smaller but can degrade image quality if settings are too low.
By contrast, lossless methods such as PNG or TIFF keep every pixel. Those files preserve sharp edges and allow transparency for logos or cropped photos without quality loss.
“Choose lossless when you need crisp transparency; choose lossy when small file weight is critical.”
- Lossy is efficient for web delivery, but it can introduce visible artifacts.
- Lossless retains all data, ideal for print or graphics that need transparency.
- Orbitvu studios tune compression to keep visuals sharp while minimizing final file weight.
- Know your destination: heavy editing or print favors raw format workflows; quick web use can tolerate some lossy compression.
Managing File Sizes and Quality Settings in Editing Software
Small changes to an editor’s quality slider can cut disk use while keeping visual detail intact.
Understanding how sliders map to real compression helps you pick sensible settings for web, print, or archive work.
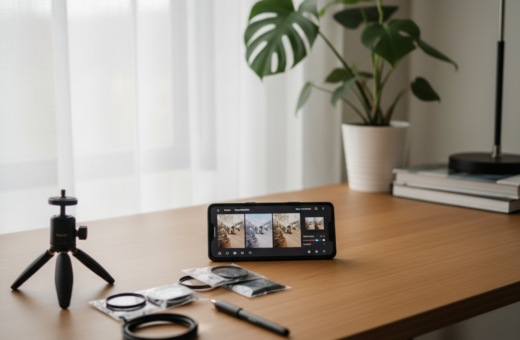
The Lightroom Quality Slider Explained
Lightroom offers 13 distinct quality steps, not a hundred. That means each click can jump compression noticeably.
A quality setting around 80 often hits a sweet spot: much smaller files with little visible loss in most photos.
Identifying Compression Plateaus
Some ranges on the slider produce identical file sizes. These are compression plateaus.
Finding a plateau saves space without sacrificing tonal detail. Test a few settings and compare the resulting files on your computer.
Avoiding Artifacts in Gradients
Excessive compression can cause banding in skies or smooth gradients. Fine detail like hair or subtle tones suffer first.
“When working with large color areas, reduce compression to prevent blocky bands.”
- Test settings with tricky photos to spot banding early.
- Ezra, a photographer, found quality 80 cut file sizes with no visible harm.
- Learn where plateaus occur so you don’t waste space on redundant data.
Selecting Formats for Specific Professional Use Cases
Match the way you save files to how they will be used: online catalogs, print runs, or layered archiving each need specific settings.
For high-traffic web use, choose smaller files that keep visual quality and load fast. Services like Orbitvu provide automated software to tailor settings for e-commerce and speed.
For printing and high-resolution delivery, use TIFF when you need lossless quality and wide color. TIFF preserves fine detail and is ideal for press or gallery prints.
For archiving work, save a layered PSD so you can reopen adjustments on a computer later. PSD keeps all layers, masks, and adjustment history intact.
“Choose the right file based on final use — web, print, or archive — to protect quality and save time.”
- Use PNG for graphics with text or sharp lines to avoid compression artifacts.
- Pick jpgs for email-friendly thumbnails when small files matter.
- Partner with reliable tech providers to streamline workflows and keep consistent quality.
Need guidance on sharing and preserving low-light photos or keeping key details online? See this practical guide on sharing low-light mobile photos with minimal loss: sharing low-light photos online.
Final Recommendations for Preserving Photographic Detail
Start every edit by saving a RAW or DNG master. That keeps full sensor data and preserves color and tonal range for later adjustments.
For web delivery, choose modern codecs like WebP or AVIF to shrink file size while keeping strong image quality. These formats help pages load faster without obvious loss.
If you prepare photos for printing, stick with lossless files such as TIFF so final prints avoid compression artifacts. In Lightroom, try a quality setting around 80 as a practical balance of size and visual fidelity.
Finally, review your workflow regularly. Match settings and formats to each job — web, archive, or printing — so every file serves its intended use with consistent quality.