Modern phones can capture mood, texture, and subtle color after dark when you control exposure, stabilization, and white balance. Turn off the flash to avoid harsh, flat results and shoot RAW when possible to recover shadow and color.
What to watch for: wall washers, uplights, downlights, neon edges, and grazing light that reveal texture. Make those elements read clearly by protecting bright highlights and framing fixtures so they guide the eye.
Expect a trade-off: your phone can gather more light with longer exposure or boost sensitivity with higher ISO. Longer exposures need a tripod or steady surface; high ISO increases noise. Aim for the cleanest compromise for sharp, usable images.
Quick preview of the workflow: plan the scene, set the camera, protect highlights, stabilize, compose for fixtures, manage mixed color, add creative light, and edit for clean detail. Use a two-shot approach: one wide context image, then a close detail shot from the same spot to tell a clear story.
Plan the Shot Around City Light and Building Features
Start by walking the block with your camera to spot how different light sources shape surfaces. Watch for grazing fixtures that reveal texture on brick, stone, metal, and columns. Side-lit surfaces read three-dimensional; front-lit walls look flat.
Scout lighting types that reveal texture and shape
Look for wall washers, spotlights, neon trim, street lamps, and path lights. Each changes shadows and highlights in a unique way. Make a quick mental map of which fixtures give depth and which wash out form.
Choose the best time window for balanced ambient glow
Plan around blue hour into early night. That soft interval keeps color in the sky so façade lights don’t feel pasted onto black. This gives cleaner exposure and truer color for your images.
Pick viewpoints that reduce “falling building” perspective
Wide angles can exaggerate converging verticals and make rooflines appear to lean forward. Step back, use the main lens rather than an ultra-wide, or gain elevation (garage, stairs, safe overlook) to correct the effect.
- Two quick shot tips: one head-on for symmetry, one at an angle for depth.
- Safety note: stay in well-lit public areas, travel light, and pre-plan your standing spot so you’re not scrambling in the dark.
Set Up Your Smartphone Camera for Low Light Success
Get your device ready: choose the primary 1x lens and confirm basic exposure before you frame the shot. Using the main lens usually gives cleaner files and better dynamic range than secondary options.
Use the main lens for cleaner low-light images
Why it matters: ultra-wide or tele attachments often rely on smaller sensors or heavy cropping. That processing can smear fine texture and raise noise in dim scenes.
Decide when to use Night Mode vs Pro/Manual
- Use night mode when the scene is mostly still and you can hold steady; it stacks frames via computational photography for cleaner images.
- Choose Pro or manual mode when you need a fixed shutter and ISO for moving subjects, mixed lights, or repeatable results.
- Keep in mind that long stacked exposures need stability to avoid blur.
Enable RAW and turn off flash
Enable RAW to preserve shadow data and flexible white balance for later edits. RAW gives better recovery of color and highlights than a single JPEG.
Turn off the flash: it flattens texture, creates hotspots, and destroys the ambient glow that defines a scene.
Quick pre-shot routine: clean the lens, tap to focus on the lit façade, and check that your phone won’t auto-switch lenses mid-capture.
architecture lighting details night photography smartphone Exposure Settings That Protect Highlights
Prioritize highlight protection so neon and street lamps keep shape in your frame. Start by exposing for the brightest elements and plan to recover shadow tone later. This prevents blown-out bulbs and preserves texture on lit façades.
Balance shutter speed and ISO to control noise and blur
Longer shutter speed gathers detail but can introduce motion blur from hand shake or moving subjects. Raising ISO reduces blur but increases noise and weakens color.
Practical tip: aim for ISO 400–800 as a starting point; adjust up only when the shutter would be too slow to hold steady.
Underexpose slightly to preserve bright elements
Highlight-first approach: lower exposure until neon, wall washers, and streetlights show structure instead of white blobs. You can lift shadows in editing but lost highlights are gone.
Use exposure compensation and bracketing
If the meter is fooled by the dark scene, dial negative exposure compensation until bright spots retain detail. When contrast is extreme, bracket frames: one darker for lights, one lighter for texture.
- Slider method: nudge exposure down until highlights keep detail, then increase ISO slightly if needed.
- Shutter vs ISO: choose a shutter that avoids motion blur; use higher ISO only to keep that shutter usable.
- Bracketing: capture at least three exposures when signs and deep shadows coexist for safe blending later.
Stabilization Techniques to Eliminate Camera Shake
Stable support is the single change that most improves long-exposure city shots with a phone. With good support you can use slower shutter speeds and keep noise low.
Tripod and mount setups for longer captures
Use a compact tripod plus a phone mount as your biggest upgrade. A tripod lets exposures run from about 1/15 seconds to several seconds or longer without blur.
Why it helps: edges, brick texture, and fixture lines stay sharp instead of turning mushy.
No-tripod methods that work on the street
If you don’t have a tripod, brace the phone against a wall, lamppost, or ledge. Rest the device on a backpack or press elbows to your ribs for extra steadiness.
Avoiding tap-induced vibration
Tap-to-shoot causes blur at multi-second shutter speeds. Use a 2-second self-timer, the volume button, or a remote trigger to fire the shutter without touching the phone.
- Pro tip: stacked night modes need near-perfect stillness—minor shake blurs the composite.
- If an image is soft, fix stability first, then lower shutter speed and raise ISO last.
Compose to Emphasize Architectural Lighting Details
Let the pattern of light tell the viewer where to look in your frame. Compose with illuminated lines as leading elements that guide attention to entrances, columns, or signature façade features.
Frame for lines, symmetry, and leading patterns
Use strong verticals and horizontal repeats to create rhythm. Symmetry works best head-on for façades and lobbies with repeated windows or columns.
When to go angled: shoot at an angle to show depth and layered light that reveals texture and form.
Wide vs telephoto perspectives
Wide lenses capture the whole building and its context (think ~24mm). A longer lens isolates fixtures and beam shapes (think ~91mm).
On a phone, use the main lens for context and the tele option to compress the scene and pull out fine material texture.
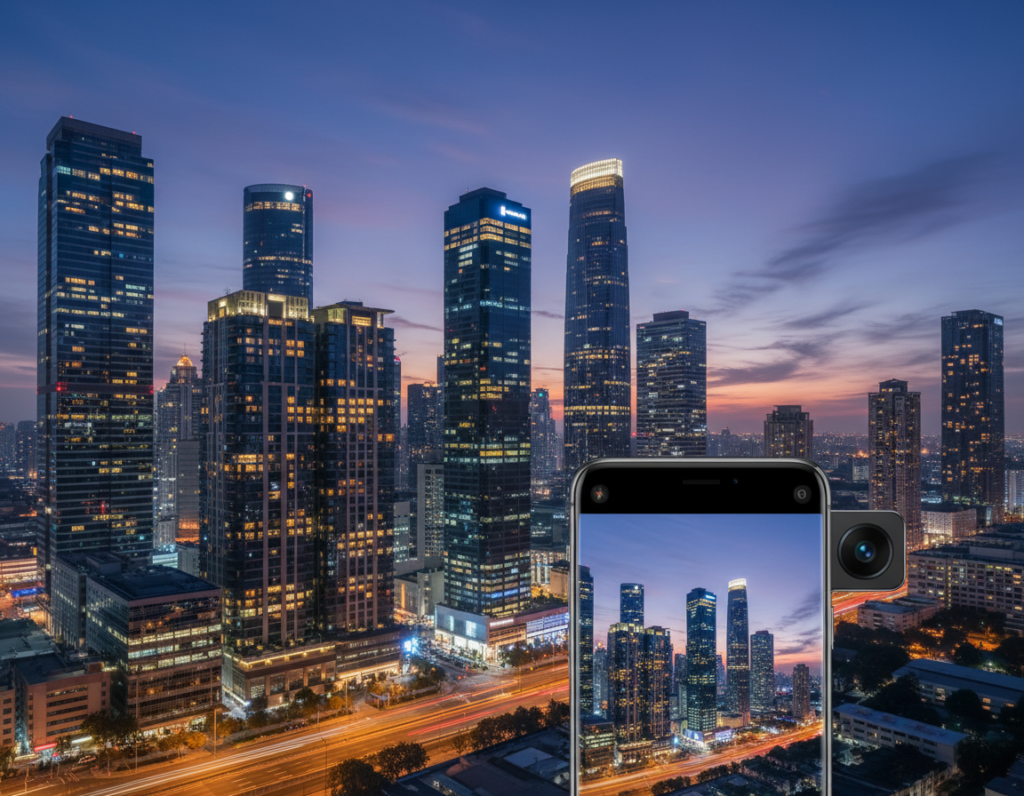
Paired-shot workflow and perspective control
Take a context image that shows the full scheme, then a close photo from the same spot to narrate the effect. Keep the camera level to reduce converging lines.
- Compose with purpose: decide if the subject is the building, the light pattern, or a single fixture and remove competing elements.
- Step back to correct perspective and crop later to keep strong geometry.
Handle Mixed Color Temperatures With White Balance Control
Mixed artificial sources often paint a scene with several competing color casts that need deliberate control.
Why this happens: US streets blend warm sodium and tungsten with cool LEDs, neon signs, and interior spill. Those varied sources fool an auto white balance and shift tones across your image.
Correct warm orange casts and strange greens
Practical fix: switch from Auto to a preset like Cloudy or Tungsten, then fine-tune until stone and concrete look believable. Preserve the mood—don’t neutralize all warmth.
Lock focus and exposure
Before you trigger long exposures, set AE/AF lock on your phone so the camera won’t hunt or re-meter mid-shot. This keeps color and exposure stable across bracketed frames.
- Test one frame and review color on-screen before committing to a set.
- Adjust WB until façades look natural and the sky keeps its tone.
- Aim for consistency so your context image and close detail images match in color and mood.
Use Light Sources Creatively Without Losing the Night Atmosphere
Use the city’s ambient glow as a creative tool instead of fighting it. Let streetlamps and neon shape form while you keep the overall mood dark and readable.
Work with ambient sources and reflections
Position yourself so lamps and signage rake across facades instead of pointing straight at the lens. Angled light reveals texture and guides the eye.
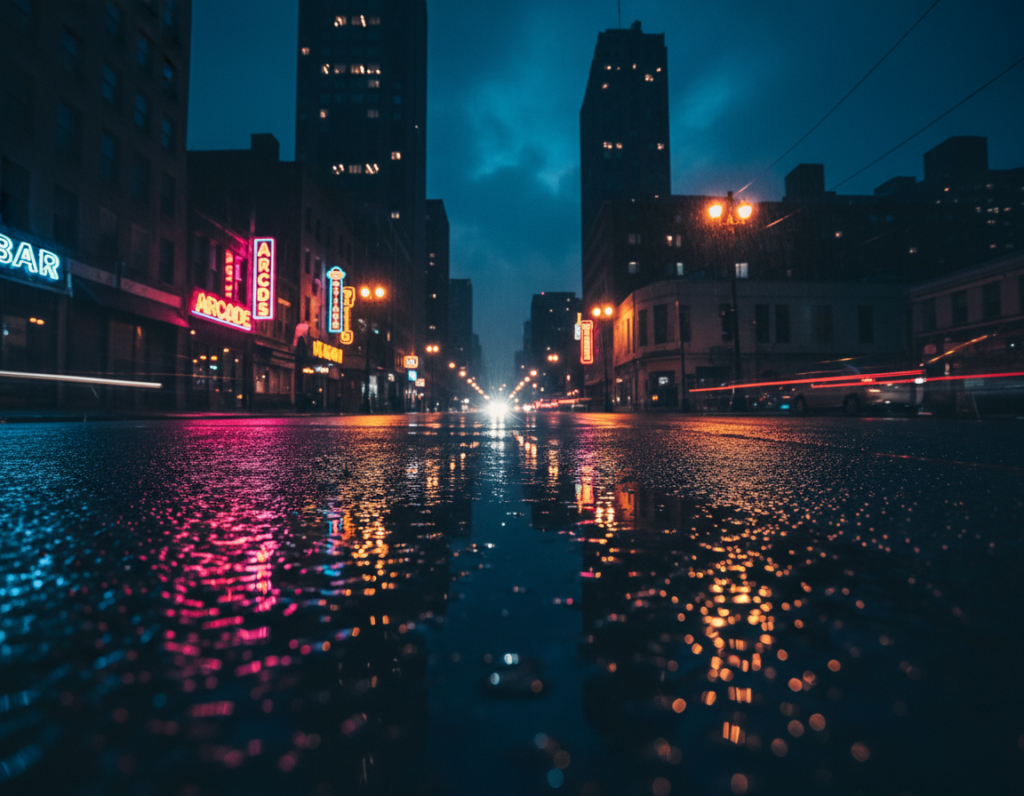
Find puddles and wet pavement for stronger mirrors
Lower your viewpoint to include puddles or wet asphalt; reflections echo the building’s illuminated lines and add depth to the image.
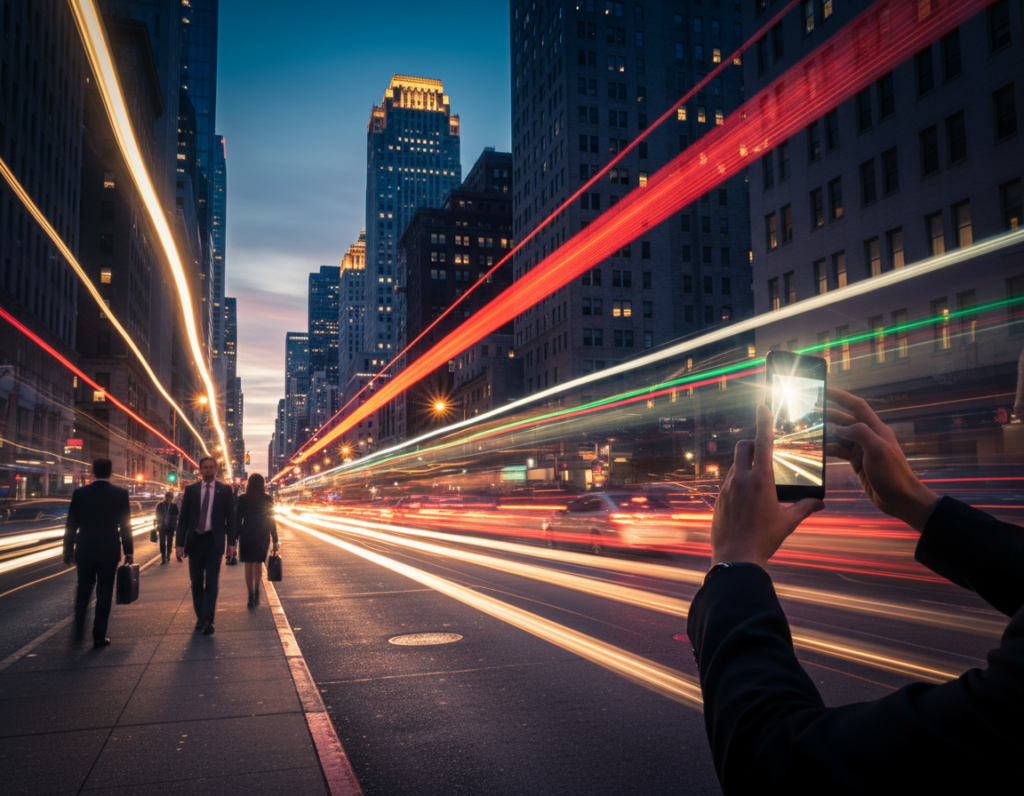
When motion helps and when it hurts
Use motion blur for car trails to add energy and direction. Choose a longer exposure for trails and a faster shutter for crisp surfaces.
Avoid blur when you need to show material texture—softness will hide the very features you want to emphasize.
- Try two frames: one frozen (fast shutter) and one long exposure for trails.
- Shift angle slightly to reduce flare and keep bright sources from dominating the scene.
- Balance highlights so the night still reads as night with readable shadows.
Add Directional Light With a Phone Flashlight When Details Disappear
If foreground materials sink into shadow, using your phone as a directional fill brings back shape while keeping mood. This method preserves the ambient city glow better than a direct on-camera flash.
When to use it: reach for the phone when façade texture or foreground subject areas lose form in low light. A small, off-axis beam reveals surface without washing the scene.
Position the beam off-axis for depth
Hold the light to the side and slightly above or below the subject so shadows define texture. Move the beam a few degrees to find the angle that sculpts brick, metal, or signage best.
Control brightness with distance, shutter, and ISO
Adjust distance first—closer equals brighter. Next, lengthen shutter time to gather more image data, and only then raise higher ISO if needed. This order keeps noise low.
Manage hotspots and color shifts
A small flashlight can create a harsh center and quick falloff. Feather the beam, sway it subtly during longer exposures, or use a diffuser to smooth transitions.
“Reveal the surface — not the spotlight.”
Note: phone light can look cool or green against warm street lamps. Plan to correct white balance locally in post so the subject reads natural. Use restraint; the aim is subtle fill, not a staged spotlight.
Edit Night Photos for Clean Detail and Natural Color
Start your edit by fixing exposure and highlights so bright elements keep shape. RAW files from the camera or sensor give the best headroom for this step.

Order and quick workflow
Work in this order: exposure/highlights, color balance, noise control, then local sharpening and finishing touches.
Targeted noise reduction and shadow work
Reduce noise selectively—apply stronger noise reduction in deep shadows while preserving texture on masonry and fabric. Avoid global smoothing that makes surfaces look plasticky.
Lift shadows gently to show structure but keep contrast. Too much lift flattens mood and kills depth.
Local fixes and color control
Use brushes to tame hotspots from lamps or flashlights and to add clarity to grazed walls or edges. Local white balance passes let tungsten areas stay warm while neutral materials look natural.
- Protect highlights first, then tweak color.
- Use selective NR only where needed.
- Export at high resolution and avoid heavy sharpening near bright lights.
“Preserve the glow—repair shadows, not the mood.”
Conclusion
Strong results start with clear choices: lens, support, and exposure.
Follow a simple repeatable formula: plan for the best city light, use the main lens, stabilize the camera, protect highlights, then refine color and noise in editing.
Decide shutter speed versus ISO based on movement and sensor limits. Trust night mode or stacked frames when the phone is rock-steady; switch to manual mode for consistent settings and moving subjects. Computational photography helps, but it cannot fix a shaky capture or blown highlights.
Make a one-line checklist: clean lens, lock focus/exposure, confirm highlight detail, and shoot context plus close frames. Revisit a well-lit building and reshoot using these settings to compare photos and improve over time.