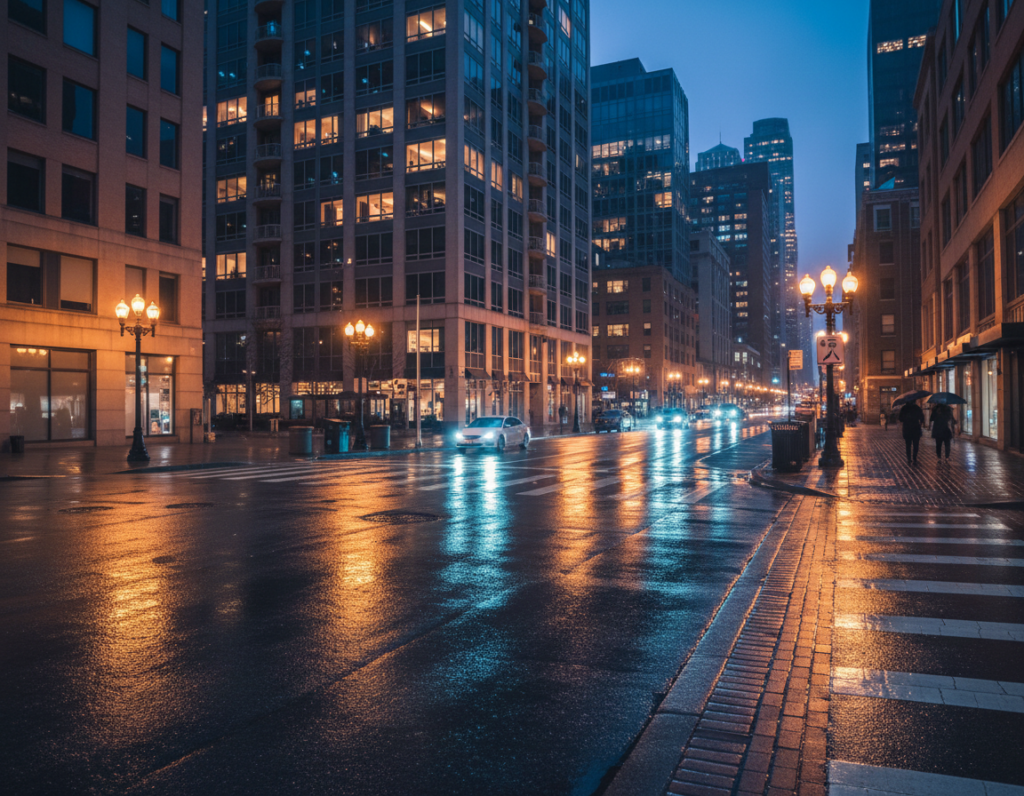
Motion light patterns are the streaks and trails made by moving vehicles and neon signs after dark. Think headlight ribbons on a highway, subway blur in a tunnel, or neon streaks along a storefront. These effects are made with slow shutter speeds and steady framing.
The creative goal is simple: keep buildings and static subjects crisp while turning moving lights into clean trails. This is controlled blur, not an accident. With the right camera approach a phone can make striking night images.
The workflow in this guide is practical. Stabilize your device, pick a mode or app that gives you manual settings, then set shutter speed, ISO, white balance, and focus. Refine composition and time your shot for busy streets.
Core principle: to record vehicle trails you need long exposure time. Stability is non-negotiable, so use a tripod and a timer or remote.
Some models include Pro options; others need third-party apps. By the end you will have a baseline settings recipe, composition ideas, and fixes for blur, noise, and odd color casts. Learn more techniques from this night shooting guide.
What creates motion light patterns in cityscapes after dark
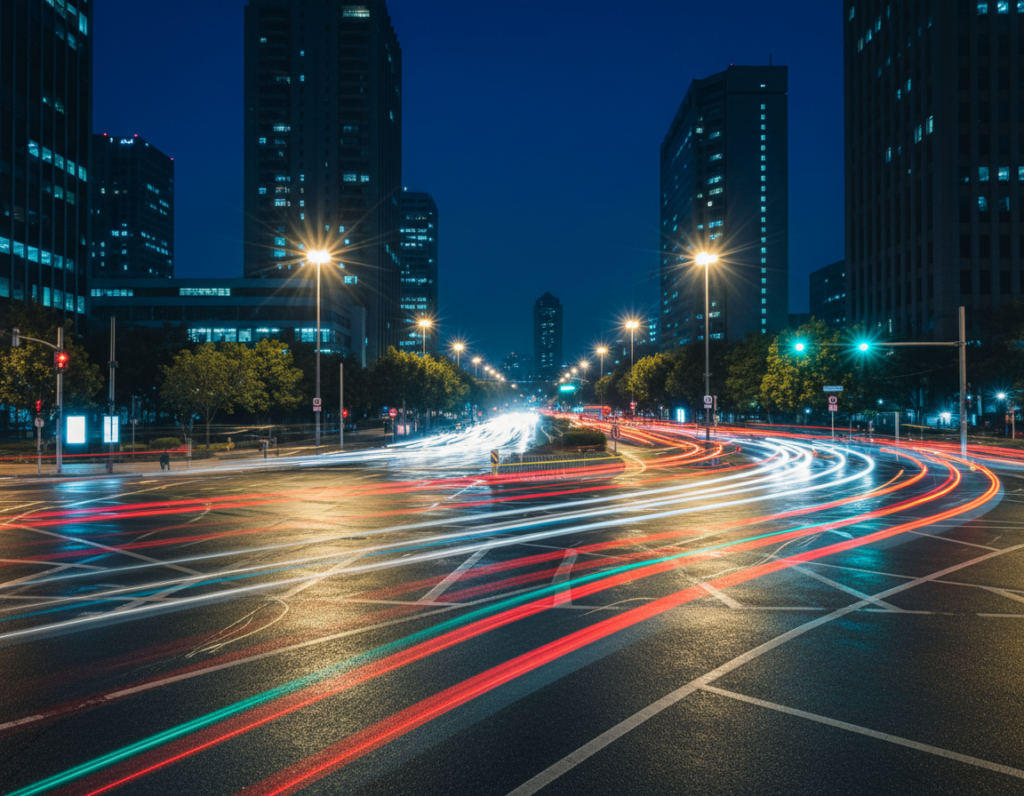
When you let the sensor collect light over extra seconds, passing cars and signs draw bright trails. This is basic: a long exposure is simply the sensor gathering light across a longer time window. Moving headlights, LEDs, and trains then paint continuous streaks instead of separate points.
Why slow shutter speed turns headlights and neon into light trails
A slower shutter keeps the sensor active longer, so any moving source records across the frame. Longer shutter speeds generally make longer, smoother trails. Shorter shutter times give dashed, more frozen marks.
How exposure time, moving subjects, and stability shape your final image
Three variables control the look: exposure time, subject speed and direction, and camera steadiness. Change any one and the pattern shifts.
- Exposure time — controls trail length and brightness.
- Subject movement — fast cars make thin, long ribbons; buses yield thicker streaks.
- Camera steadiness — any camera shake turns intended trails into unwanted blur.
In cities, cars through intersections can form S-curves, buses make dense strokes, neon smears if the phone shifts, and pedestrians ghost as faint figures. Intentional blur looks smooth and directional; unwanted shake is jittery and soft across the whole frame.
“A long exposure captures time in a single image — that’s where the creative effect comes from.”
Gear and setup for sharp buildings and smooth light trails
A solid support and a careful setup are the difference between crisp buildings and messy streaks. Start by choosing a stable support that locks your phone in place for the full exposure.
Tripod or stabilizer basics
Tripod or stabilizer basics for long exposures on a phone
Use a mini tripod, tabletop tripod, clamp, or any stabilizer that holds the camera steady. Even Night mode needs the phone stable while the image is recorded.
Remote shutter or timer to reduce camera shake
Trigger with a Bluetooth remote or a wired button to cut vibration. If you don’t have one, set the 2s/3s/10s timer so the phone settles before the shot.
Phone holders, framing choices, and keeping the camera level
Use a rotating holder to switch portrait and landscape. Portrait often highlights tall buildings and leads traffic lines up the frame.
- Setup routine: mount the phone, tighten knobs, press down gently, then wait a second before triggering.
- Leveling: use grid lines and align horizons to avoid leaning buildings.
- Scouting: pick a safe spot—railings, low walls, or wide sidewalks so you won’t block pedestrians.
“A steady foundation makes the streaks sing and the architecture stay true.”
Choosing the right camera mode and app for manual control
Pick a camera mode that gives you predictable exposure and real shutter control for deliberate night streaks.
Auto mode is fine for quick handheld shots. It boosts shutter speed and may fire flash to avoid blur. That behavior often prevents the long exposures you want for trailing headlights.
Standard/Pro-lite modes let you tweak white balance, HDR+, timer, and resolution. They give more useful settings when you need stability but not full pro features.
Auto vs standard vs pro options for after-dark city scenes
Pro or Pro-style modes let you set multi-second shutter speeds, lock focus, and lower ISO. Use them when you want clean streaks and steady architecture.
Not all phones ship with full pro features. Samsung Expert RAW, Sony Photo Pro, and OnePlus flagship pro modes often expose shutter and ISO. Pixel models vary in what they allow.
When Night mode helps — and when it fights your trail look
Night algorithms combine multiple frames to reduce noise and brighten shadows. That is great for static scenes and crisp buildings.
But multi-frame merging can soften or fragment trails. If your goal is long, continuous streaks, test Night mode first; it may erase the very trails you planned.
How to tell if your phone supports true manual settings
- Look for labels like Pro, Manual, or Expert RAW.
- Check if you can set shutter speed in seconds and lock focus.
- If you only see a brightness slider, you likely lack full access to shutter and ISO.
Third-party apps and compatibility notes
Third-party apps such as Moment can add shutter, focus, and ISO control. Compatibility varies across Android models, so test the app before you shoot.
“Verify you can set a multi-second exposure, lock focus, and keep ISO low — otherwise switch apps or modes.”
manual controls motion light photography smartphone settings to dial in
Dialing in the right exposure settings is how you turn busy streets into clean streaks and crisp buildings. Start with a stable mount, then use the following recipe to get consistent results.
Starter recipe: stabilize the phone, set a slow shutter in the multi-second range, lock focus, then refine exposure with ISO or EV rather than shortening the shutter immediately.
Shutter speed: picking slower speeds for cleaner trails
Shutter speed is the exposure time that defines trail length. Use shorter long exposures (1–3s) when traffic is dense. Choose longer shutter speeds (5–15s) for sparse flow to “collect” more movement.
Keep the device perfectly still; trail cleanliness improves dramatically when the camera doesn’t move.
ISO and sensitivity: keep ISO low for cleaner night photos
ISO increases sensor sensitivity and brightens the frame, but it also adds noise. Aim for low ISO and raise it only if you cannot get enough exposure with a longer shutter.
Think of sensitivity as the trade-off between brightness and image quality. Balance it against shutter time, not as a first resort.
EV/exposure compensation: quick field fine-tune
EV is a fast way to nudge exposure when the composition is right. Use EV to brighten or darken without reworking every setting.
White balance: handle mixed color casts
Adjust white balance (Kelvin) to neutralize orange sodium lamps or greenish LEDs. Set a cooler Kelvin to tame warm streets, or warm it slightly to keep neon vibrant.
Focus: tap-to-focus vs manual focus
Tap-to-focus works well for mid-street action. Use manual focus for distant skylines or when autofocus hunts in low light. Lock focus once it’s set to avoid shift during long exposures.
HDR and resolution choices
HDR can merge frames and blur moving streaks. Turn it off if you need continuous trails. Higher resolution helps building detail but may slow processing and use more space.
- Check images by zooming in on edges for shake.
- Adjust shutter speed, ISO, or WB one step at a time.
- Iterate: review, tweak, and reshoot until trails and buildings balance.
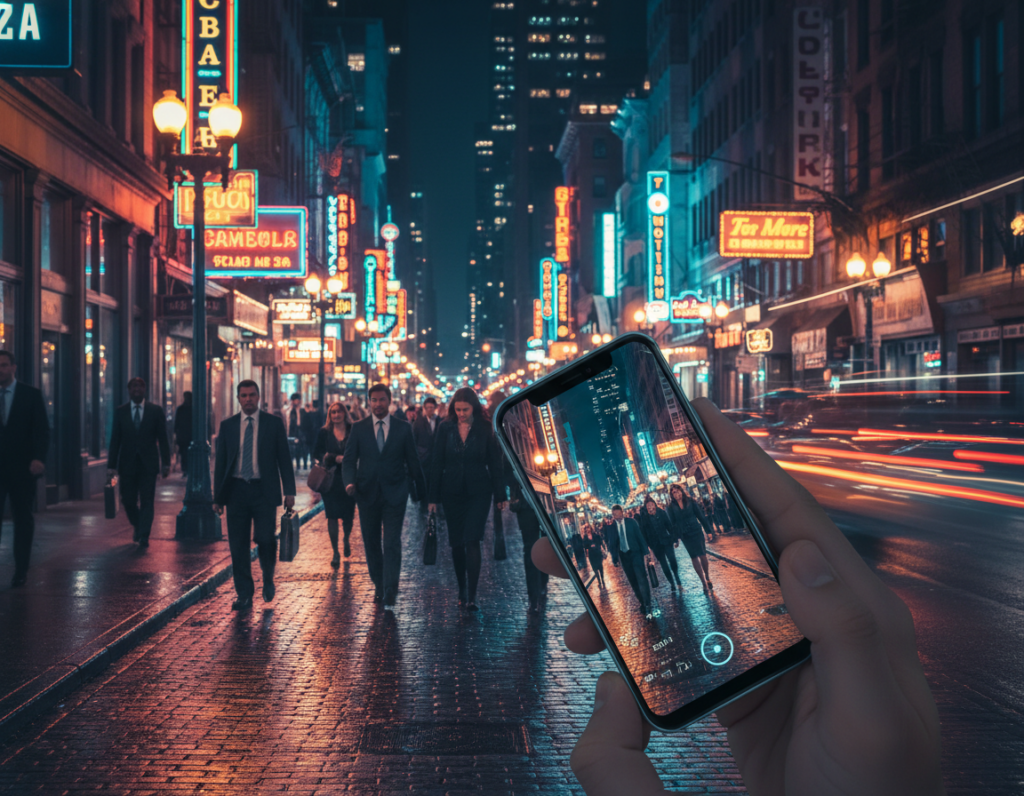
Shooting techniques for dramatic motion blur and light trails
Pick a scene where traffic and architecture work together to make bold streaks across the frame. Look for intersections, overpasses, or bridges where cars flow steadily and lane markings form natural leading lines.
Design the trail: place the camera so vehicles move across the frame, not straight at you, to get longer, readable streaks. Use an elevated view for cleaner geometry or a low curb angle for thicker bands.
Keep the subject sharp: lock the camera on a fixed anchor—clock tower, facade edge, or street sign—then recompose if needed. A locked focus and solid mount separate crisp buildings from flowing blur.
Shoot multiple frames and change one variable at a time: alter shutter time or ISO between tries. Start exposures when traffic density matches your goal and repeat until the streaks read well in your images.
- Try diagonal angles to add energy without tilting architecture.
- Anticipate gaps so you don’t end with lone short streaks; retake to stack chances.
- Pick safe, stable spots—avoid bike lanes and keep gear minimal for quick swaps.
“To include vehicle trail lights you need slow shutter speed.” — Alex, Dublin Photographer
For more technique examples and framing ideas, read a short guide on how to shoot light trails.
Fix common problems in low-light mobile photography
Before blaming traffic or neon, run a quick check to find what went wrong. Use this short diagnostic to tell intentional streaks from accidental blur and to recover cleaner images fast.

Too much blur: camera shake or intended streaks?
Quick test: if the entire frame is smeared, it’s camera shake. If buildings stay sharp and cars are streaked, the effect worked.
Fixes: tighten the mount, use a timer or remote, avoid touching the phone, shield the setup from wind, and only shorten shutter speed after stability is certain.
Too much noise: balancing ISO and exposure
Lower ISO first and lengthen exposure to keep images clean. Pushing ISO creates grain and color specks, especially in skies and shadow areas.
Review at 100% zoom on building edges and shadows to spot noise or micro-shake and then tweak one setting at a time.
Strange colors and focus trouble
Set white balance in Kelvin until neutral surfaces look right. Accept some color contrast in trails as creative.
If focus hunts in dark scenes, tap a high-contrast edge or switch to manual focus and lock it before shooting.
“Stabilize → set shutter time → set low ISO → fine-tune EV → set WB → lock focus → shoot and adjust one variable at a time.”
Conclusion
Mastering night scenes starts with a repeatable routine and a clear plan for each shot.
Choose a camera mode or an app that gives real exposure access, lock the phone on a stable mount, then use a slow shutter to paint trails. Keep ISO low, set white balance, and lock focus so buildings stay crisp while streaks form.
Decision note: Auto is easy but often prevents long exposures. Pro or a true manual mode is the most reliable path to dramatic results on many phones and cameras.
Practice at one intersection, test a few shutter times, and keep notes. If frames look messy, fix shake first, then noise, then color. Small gear changes—rotating holders, a remote, or a trusted third‑party app—deliver big gains.