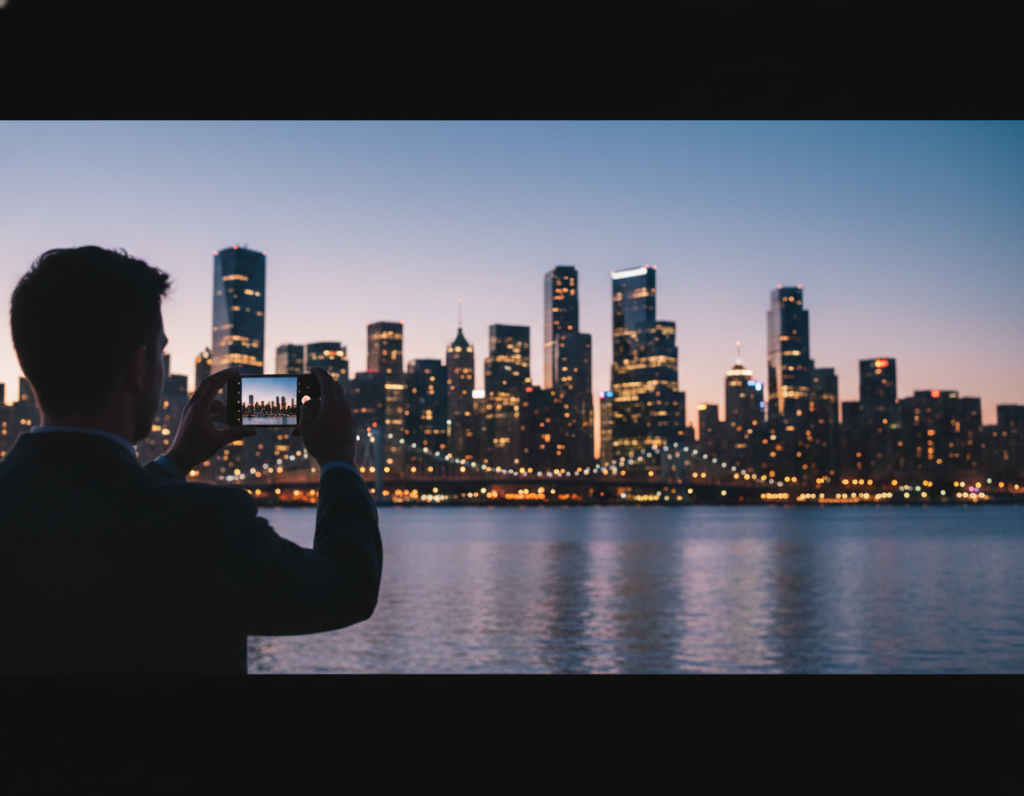
This short guide shows how modern phones can capture mood, texture, and color after dark when you manage settings on purpose.
Goal: keep headlights, signs, and neon from blowing out while the scene still reads as night.
You will learn a practical, repeatable workflow built for a phone. Use a built-in Pro mode or a trusted app to set shutter and ISO, lock values, and avoid full auto. Start by protecting highlights, then add light carefully with shutter speed and ISO choices.
This approach explains common failures: everything smoothed to mid‑gray, or protected highlights that leave streets as silhouettes. Expect clear steps: lens and RAW choices, shutter recipes for freezing motion versus light trails, and simple editing priorities for clean results.
– Protect highlights first; add brightness with shutter and ISO.
– Use steadiness and RAW for best detail and lower noise.
Why Night Traffic Photos Look Too Bright (or Too Dark) on Smartphones
When light is scarce, a phone has two basic choices: more collection time or more gain. Each option changes how images look and what problems appear in a final frame.
Longer capture time lets the sensor gather more photons but risks blur from moving cars and hands. Higher ISO amplifies the signal so scenes get brighter fast, yet it brings visible noise and color shifts.
Bright point sources like headlights clip highlights quickly. Once a headlight hits clipping, those pixels lose recoverable detail and read as blown white. That makes lamp posts and signs unforgiving in mixed scenes.
How computational stacking affects brightness and detail
Night processing often stacks frames to lift shadows and reduce noise. That can brighten scenes and reveal detail, but it may also flatten contrast, smear moving cars, or introduce ghosting and odd sharpening.
- Sensor limits force a trade-off between blur and noise.
- Lights clip fast; protect highlights first to keep detail.
- Computational modes can brighten too much and change texture.
Understanding these limits helps you pick the right approach instead of fighting the image later. For more practical tips on how to take better nighttime photos, see take better nighttime photos.
Set Up Your Smartphone Camera for Manual Exposure Control
Make setup your priority: the right app, the main lens, and RAW will solve most low light problems before you shoot.
First, find a Pro or similar mode on your phone so you can change shutter speed, ISO, and focus behavior. Android builds often include this; iPhone users may need a third-party app for deeper settings.
Choose an app that opens real controls
Install a trusted option like Moment if your default camera lacks options. Confirm you can set shutter, ISO, and manual focus when needed.
Prefer the main 1x lens
Use the main lens for the best low light results. Its larger effective sensor area and brighter optics give cleaner images than ultra-wide or tele modules.
Enable RAW and keep flash off
Turn on RAW (DNG) to preserve shadow and color data for later edits. Disable the flash to keep street and car lighting natural and cinematic.
- Keep autofocus active but lock it if the camera hunts.
- Pick consistent settings and gear so results repeat from shot to shot.
manual exposure control night traffic smartphone photography: The Exposure Triangle on a Phone
The practical triangle on a phone swaps aperture for decisions you can actually change: shutter speed, ISO, and exposure compensation or lock. Use these three to shape brightness, detail, and motion in city scenes.
Shutter speed is the sensor’s “light collector.” Longer shutter time gathers more photons, so dark streets get brighter. But longer time also risks motion blur from cars and your hands.
ISO acts as the amplifier. Raising ISO makes the sensor read a stronger signal quickly, yet it adds visible noise and can soften fine detail or shift color in shadow areas.
Think of shutter and ISO as a pair: for the same final brightness you can use a slower shutter plus lower ISO, or a faster shutter with higher ISO. Pick based on whether you want frozen action or smooth trails.
“Protect highlights first: slightly underexpose to keep headlights and signs from clipping, then recover shadows if needed.”
Use exposure compensation when you need a quick shift without full manual settings. Or lock AE/AF to hold your chosen brightness while you recompose around bright lamps and moving vehicles.
- Triangle = shutter speed + ISO + exposure compensation/lock
- Longer time = more light, more blur risk
- Higher ISO = more brightness, more noise
Step-by-Step: Dial In Brightness Without Blowing Out Headlights
Start each frame by prioritizing the brightest lights. Protect headlights, street lamps, and LED signs first so they keep shape and readable detail. Slight underexposure is safer because clipped highlights cannot be recovered.
Underexpose slightly to save highlight detail
Set a small negative EV, for example -0.3 to -1.0, when the scene is full of bright points. This keeps lamps from turning into white blobs and preserves texture in glare sources.
Adjust shutter before raising ISO
Change shutter speed first to collect more light when the scene is mostly still. If motion becomes a problem, accept a faster shutter and raise ISO only as needed to avoid blur.
Use histogram and highlight warnings
Check the histogram or blinkies to confirm when lights clip. Once highlight pixels clip, detail is gone regardless of editing. Treat these tools as a final check before you take the shot.
Bracket mixed scenes and take multiple shots
For high-contrast streets, capture a few different exposures: one for highlights, one for midtones, and one for shadows. Also take several shots in sequence—car positions and flare change the result.
- Compose first, set for the brightest elements.
- Underexpose slightly; recover shadows later.
- Bracket when lights vary across the frame.
The goal is balance: controlled highlights and readable detail where it matters, not just maximum overall brightness.
Shutter Speed Recipes for Night Traffic Photography
Decide whether you want crisp detail or flowing streaks before you change any settings. Your choice of shutter speed sets the creative tone for the frame and fixes the trade-offs you will accept.
Freeze motion for street action
Recipe: aim for faster shutter speeds in the 1/100–1/250 range, then raise ISO until the frame is usable. This freezes cars and people and keeps signs readable.
Use this when you need license plates, readable shop fronts, or a documentary look. Expect more grain as you push ISO, but you keep sharp detail.
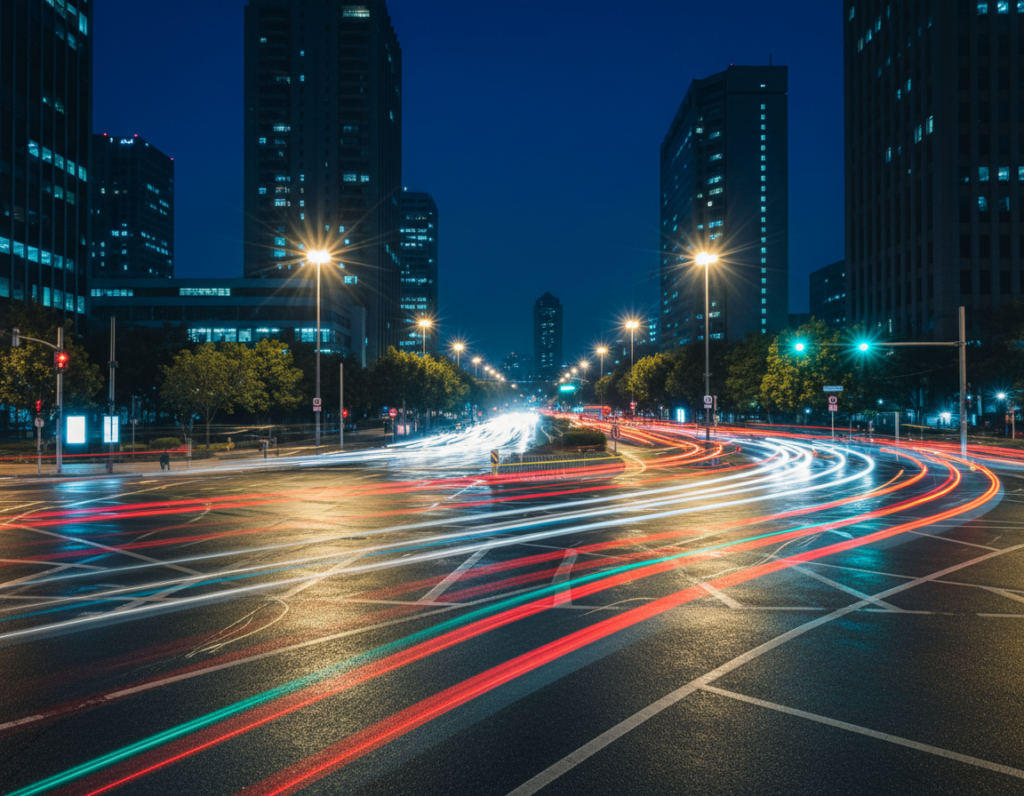
Create clean light trails
Recipe: try slow shutter speeds from about 1/4 second to several seconds for continuous trails. Mount the camera on a tripod or solid support to avoid blur unrelated to moving vehicles.
With long exposure the headlights become clean lines and taillights paint ribbons. Protect highlights so lamps don’t clip into white blobs.
Balance blur versus legibility
If you must read plates or signs, pick speed over smooth trails and accept noise. For creative streaks, pick longer speeds and steady support. Test each intersection and wet street; flow and light intensity change what works.
- Freeze motion: 1/100–1/250, raise ISO.
- Trails: 0.25s to several seconds, use tripod.
- Hybrid: bracketing shots at different speeds to choose later.
ISO and Noise Control for Clean Night Photos
Start low on ISO, then raise it only to the point where motion is controlled and noise stays acceptable. That simple rule helps you keep color and detail without letting bright lights blow out or shadows turn into mush.
Practical ISO ranges: many modern phones look best around ISO 400–800 when conditions allow. Try that as a first step, then increase if you must freeze motion or shoot handheld.
When to push higher
Raise ISO when cars are close and fast, when you have no stable support, or when you need a fast shutter for readable signs and people. Expect more grain as you go higher; plan targeted noise reduction later.
Spot noise vs blur
Review images at 100% on your screen. Noise appears as grainy speckle and color blotches. Blur looks like directional smear or double edges. Each problem needs a different fix.
Why longer time often wins
If you can stabilize the phone, pick a lower ISO and extend the shutter time. A steadier capture usually yields smoother tones and better detail than cranking gain on a small sensor.
“Stabilization + highlight protection + moderate ISO yields files that edit and print better.”
- Start low; increase iso only to stop motion.
- Zoom in to diagnose noise versus blur.
- Prefer longer time with support when the scene is mostly still.
Test a few frames, inspect at full size, then tweak settings for the right balance. For more on settings and highlight handling, see night settings guide.
Stabilization: The Fastest Way to Improve Exposure and Sharpness
Good stabilization is the single change that most reliably lifts image quality after dark. It unlocks longer shutter times at lower ISO and gives sharper, cleaner frames.
Tripod and phone mount basics
Use a small tripod and a secure phone mount to keep the camera steady. Pick a stable spot away from vibration—avoid flimsy railings and busy bridges.
Remote shutter and timer tricks
Trigger with a remote, the self-timer, or the volume button to prevent tap-induced shake. This matters most for multi-second shots.
Improvise with city gear
When you lack a tripod, brace the phone on a concrete barrier, a ledge, or a packed backpack. Pressing the device against a pole also reduces movement.
Why multi-frame modes still need steady input
Even stacked modes blend short frames. Drift between frames creates blur, so steadiness improves final results.
“Stabilization reduces failed shots and makes settings predictable.”
- Quick workflow tip: secure the support, then recheck framing and exposure so bright lamps stay out of the meter.
- Consistent support equals more repeatable results when shooting after dark.
Focus and Metering for Night Streets With Bright Spots
Getting focus and metering right makes the difference between a crisp city frame and a muddled blur.
When autofocus works—and when to lock focus
Autofocus often performs well under street lamps and illuminated signs. The system can lock quickly on contrast-rich areas like edges of buildings or lit signs.
However, AF may hunt if contrast is low or a bright headlight dominates the scene. If your camera finds sharpness, lock it and recompose to avoid shifting between frames.
Why evaluative metering helps mixed lighting
Use evaluative or multi-segment metering for varied scenes. It evaluates the full frame and gives balanced results when headlights enter or leave the shot.
This makes it easier to keep midtones and street texture readable as cars move through the frame.
When to use manual focus and the limits of highlight-weighted metering
If AF fails repeatedly, switch to manual focus and set distance roughly to your subject; keep that setting for repeat frames.
Warning: highlight-weighted metering protects lamps but can push shadows so dark that background detail disappears. Meter with intent: decide whether the subject is the glow of lights, the people on the sidewalk, or the distant skyline, then lock focus and metering.
- Tip: once you have a solid focus and a metering baseline, shoot several passes to capture different car positions.
- Rule: prefer consistency across frames to improve your odds of a clean final image.
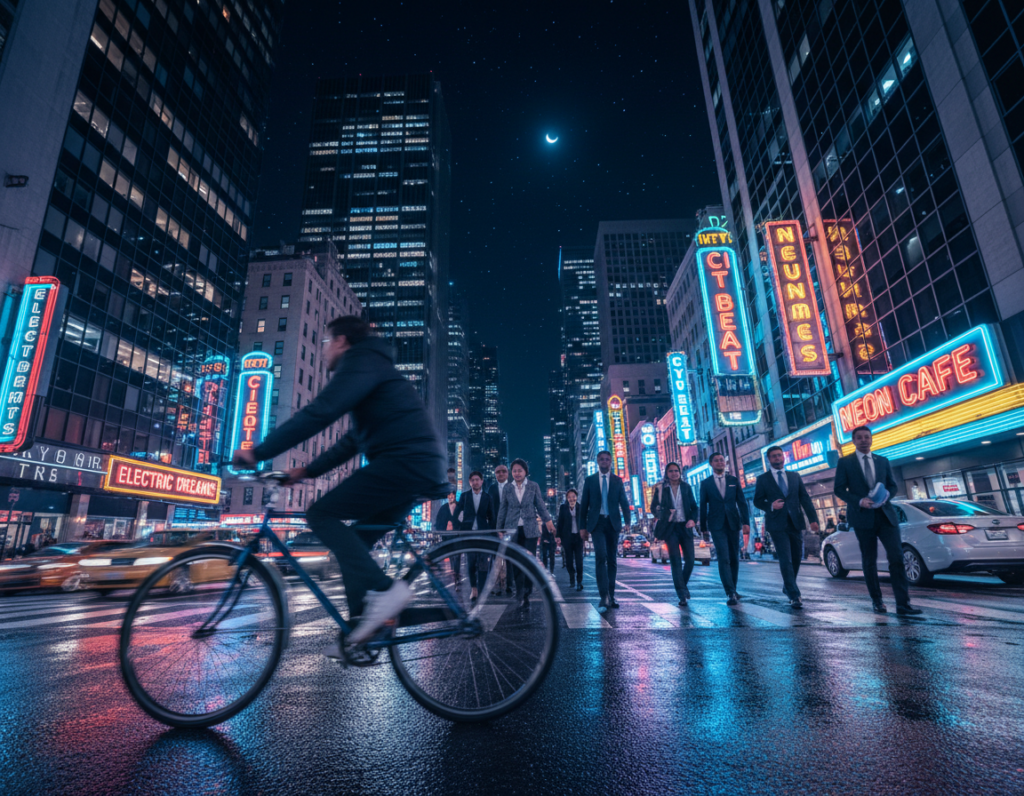
White Balance in Mixed Street Lighting (Tungsten, LED, Neon)
Mixed street lights can make colors drift across a single frame, confusing automatic settings. A scene may hold warm tungsten lamps, cool LEDs, neon signs, and harsh headlights all at once. That mix forces hard choices when you set white balance for usable images.

Auto white balance vs manual white balance in busy scenes
Auto white balance is useful when you are shooting quickly and need to capture the moment. If you shoot RAW, AWB shifting is less risky because you can tune color later in post.
Manual white balance helps when one light type dominates, such as streets hung with sodium or a row of warm shop lamps. Locking a Kelvin value reduces frame-to-frame drift and keeps color consistent across a series.
Why RAW makes color fixes easier in post
RAW files retain more color and tonal data than compressed JPGs. That means you can change white balance widely in post without banding or ruining shadow detail. Aim for believable skin tones and readable signs, not absolute neutrality—preserve the scene’s mood.
- Test a Kelvin setting, then lock it for multiple frames.
- Prefer the main lens for steadier color and better low-light performance.
- Shoot RAW when you plan significant white balance tweaks in post.
“Preserve mood first, neutralize skin tones second.”
Editing to Fine-Tune Brightness After the Shot
Fine edits let you keep the scene’s mood while improving legibility. Start by taming bright lamps and signs, then lift shadows sparingly so the frame still feels like evening. This order preserves detail that cannot be recovered if highlights clip.
Recover shadows without flattening the atmosphere
Raise shadows just enough to reveal street texture and subjects. Avoid pushing them to daylight levels; keep some rich blacks so depth stays intact.
Tip: use local sliders or masks to brighten sidewalks and people while leaving the sky and distant buildings darker.
Targeted noise reduction to keep texture and detail
Apply stronger noise reduction in deep shadow areas where grain is most visible. Use lighter processing on midtones and edges to preserve building details and asphalt texture.
Work at 100% when you tune noise so you don’t erase fine elements that give the scene character.
Control highlights first: lamps, signs, and car lights
Pull down highlights and whites to restore shape in lamps and LEDs. When reflections on wet streets or puddles amplify light, use local reductions to stop reflections from stealing attention.
Avoid trying to recover clipped pixels; protecting highlights in post works only when data remains.
Sharpening dos and don’ts to avoid halos and crunchy lights
Sharpen after noise work and apply it selectively. Use edge-aware tools and keep global sharpening low to prevent halos around bright edges.
Final check: compare results at screen size and at 100% to ensure the image looks natural and the edits match your original settings and intent.
- Tame highlights
- Lift shadows selectively
- Reduce noise by region
- Sharpen lightly and locally
“Good capture and steady support make post work easier and preserve cleaner results.”
Conclusion
Core workflow, use the main lens, enable RAW when possible, turn off the flash, stabilize the phone, and protect highlights before brightening shadows. This is the heart of good manual exposure control night traffic smartphone photography.
Decide your shutter speed based on motion intent, keep ISO low, and use exposure compensation or lock to hold brightness. Check highlight warnings and take multiple shots so you can pick the best result.
Steady support — a tripod or solid improvised rest — yields longer times at lower ISO and cleaner files. As a photographer, set intent first: frozen action, readable signs, or flowing trails, then let that choice guide settings and speed for the final look.
Final quality target: headlights keep shape, street lights show controlled glow, and the scene still reads as evening rather than a brightened screenshot.